Core concepts
QR Payment Integration
🧾 QR Payment Integration Guide
Learn how to integrate QR-based payments into your platform using VPAY, allowing users to pay by scanning dynamic or static QR codes.
This guide will show you:
- How to generate QR codes
- How to initiate a payment from a scan
- How to verify and handle payment results
📷 Step 1: Navigate to the "Generate Link" Page
Before any payment can be made, users must navigate to the "Generate Link" section of your system.
Here they’ll prepare the transaction by selecting:
- Merchant to receive funds
- Whether amount is fixed or variable
- Optional notes or reference fields
Once submitted, the system prepares all necessary details for the next step.
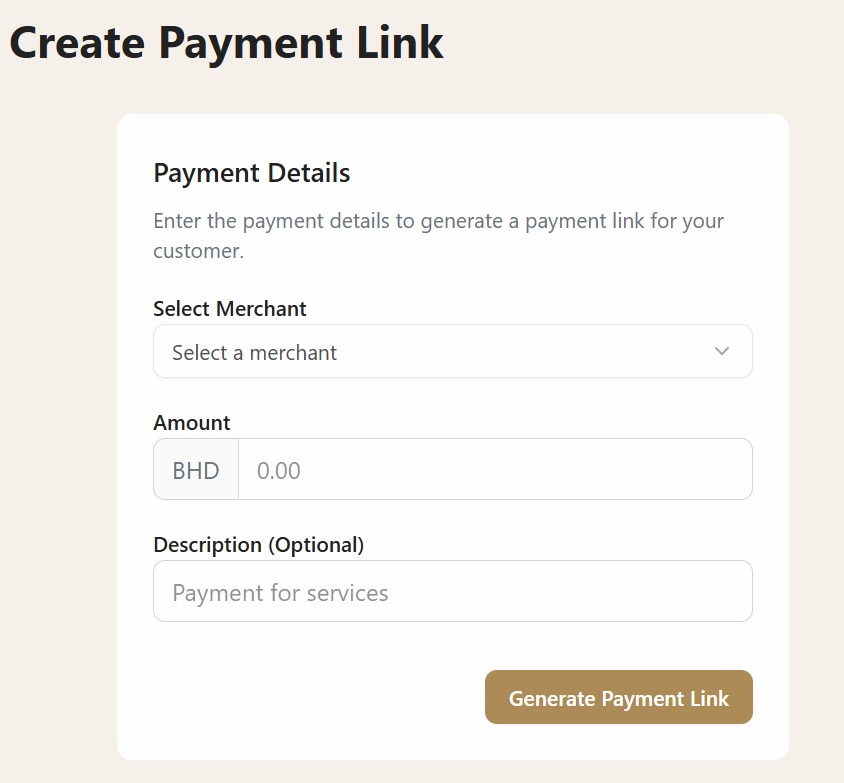 Begin by preparing the payment details in your system
📋 Step 2: Enter Payment Details
After navigating to the correct page, the user inputs:
- 🧑💼 Recipient (merchant ID)
- 💵 Amount to pay
- 📝 Optional message or reference
These values are used to customize the payment experience before generating the final link.
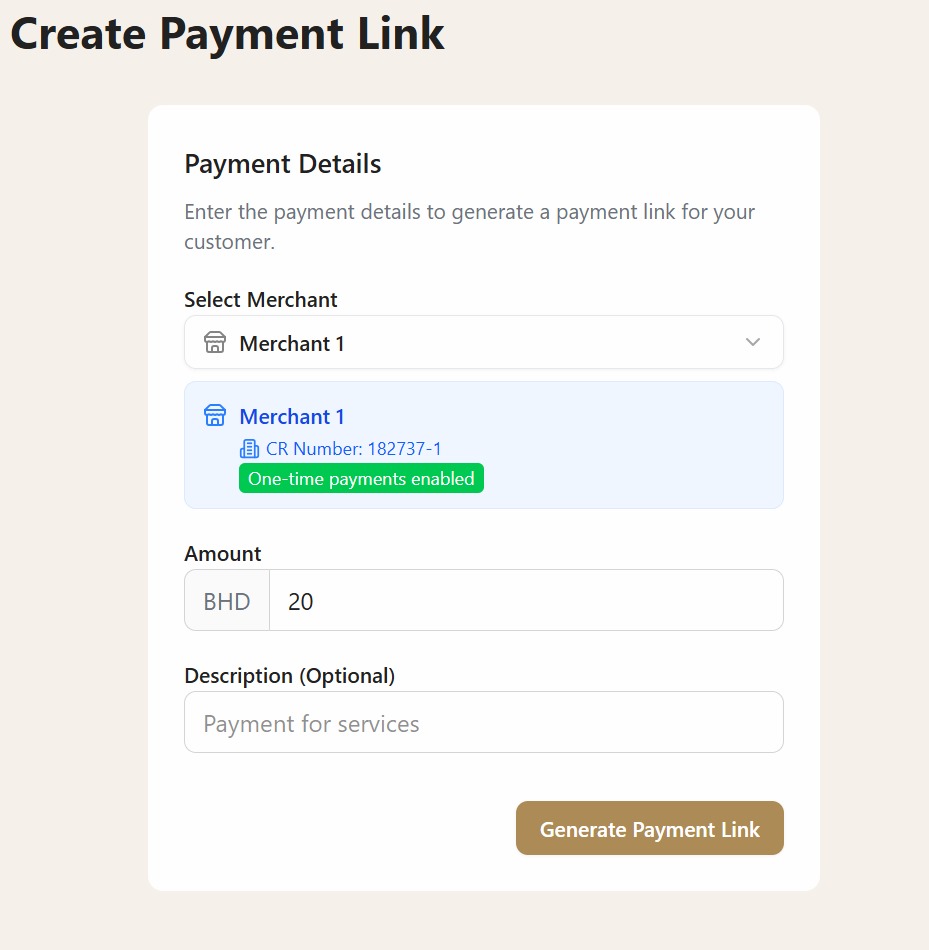 Fill out the merchant, amount, and optional note before generating the QR code
🧾 Step 3: Generate the Final QR Code
Now that the system has all the necessary information, it generates a final QR code pointing to the payment link.
Users can:
- 📷 Scan the QR with their phone camera or app
- 📋 Copy the link manually if needed
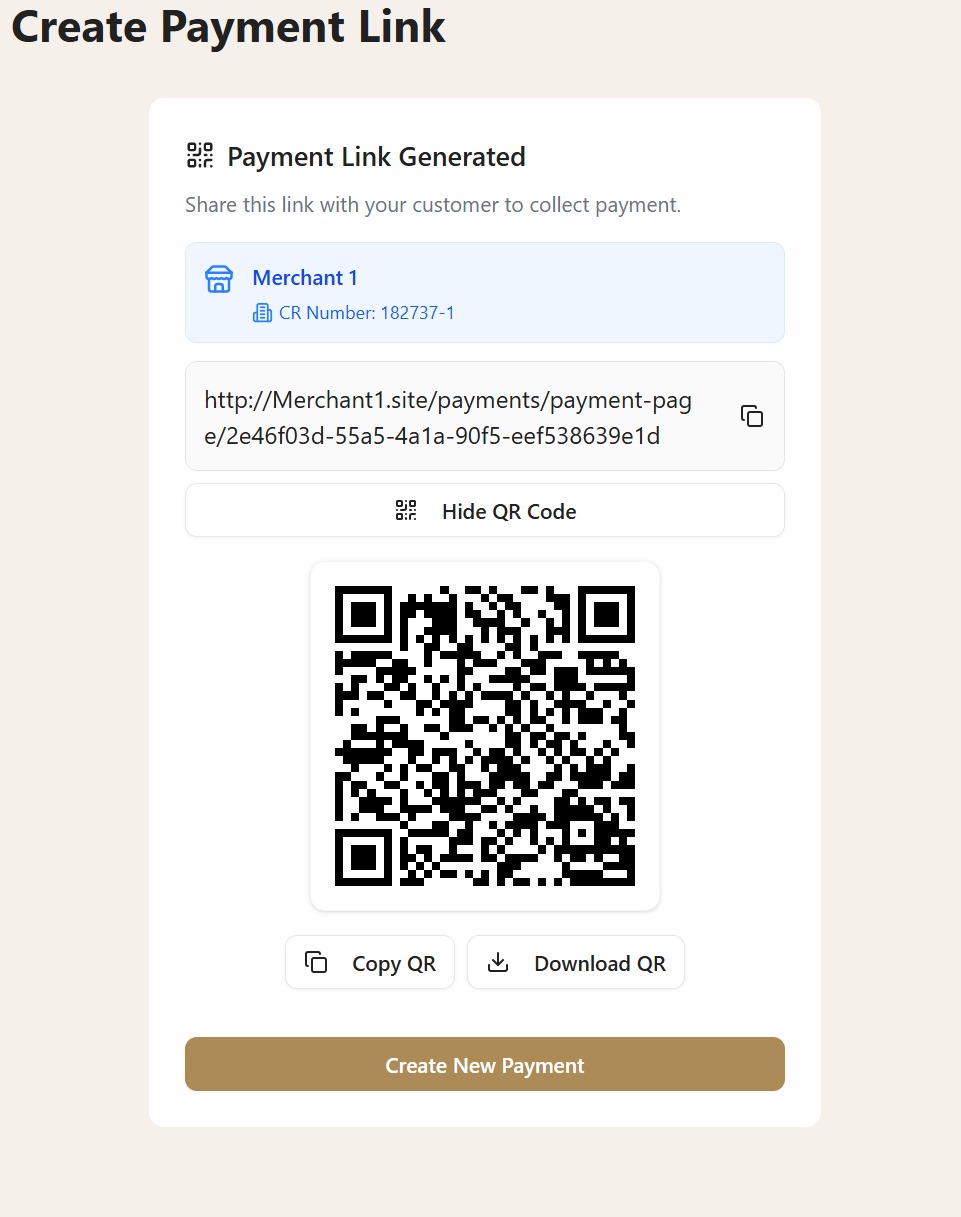 A ready-to-scan QR code is generated for easy access to the payment page
💳 Step 4: Choose Preferred Payment Method
After scanning the QR code and being redirected to the payment page, the user is presented with available payment methods.
Supported options may include:
- Credit / Debit Card
- BenifitPay
The user selects their preferred method to proceed.
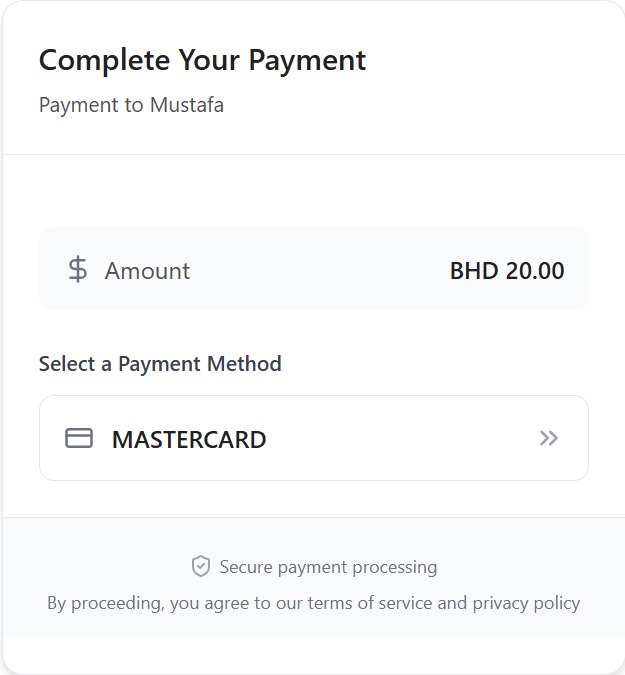 User chooses a payment method before entering sensitive data
🛂 Step 5: Enter Card Information (if applicable)
If the user selected Credit/Debit Card, they’re taken to a secure screen where they enter:
- Card number
- Expiration date
- CVV
- Billing address (if required)
🔒 This step should always occur on a secure, encrypted connection and never be handled directly by your frontend logic.
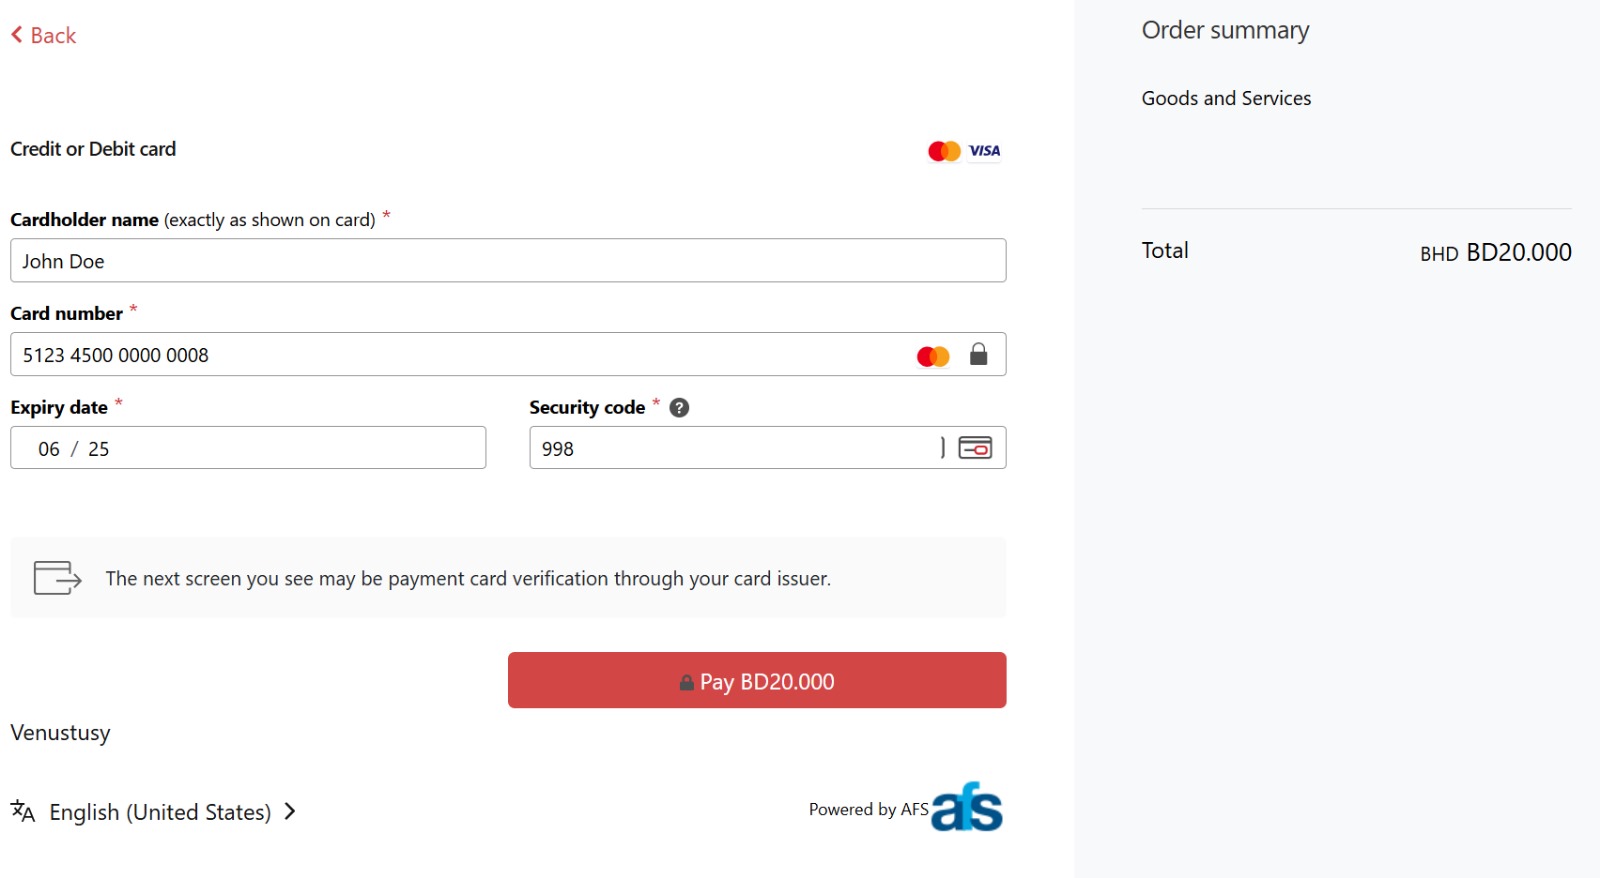 Secure card entry screen after selecting credit/debit card as the payment method
🎯 Step 6: Redirect to Payment Result Page
Once the payment is processed, the user is redirected back to one of your configured URLs:
/success– for successful payments/cancel– for failed or canceled transactions
You can now update your database or notify the user accordingly.
🚫 This final screen is represented by a placeholder for now.
✅ Summary of the Flow
| Step | Action |
|---|---|
| 1 | Prepare payment details in your system |
| 2 | Fill in merchant, amount, and optional info |
| 3 | Generate the final QR code |
| 4 | User selects preferred payment method |
| 5 | User enters card information securely |
| 6 | Redirect to success/cancel page based on result |