Introduction
🏢 Merchant Onboarding Guide
Welcome to the merchant onboarding experience. Follow these steps to configure your business, set up payment methods, and gain access to your financial ecosystem.
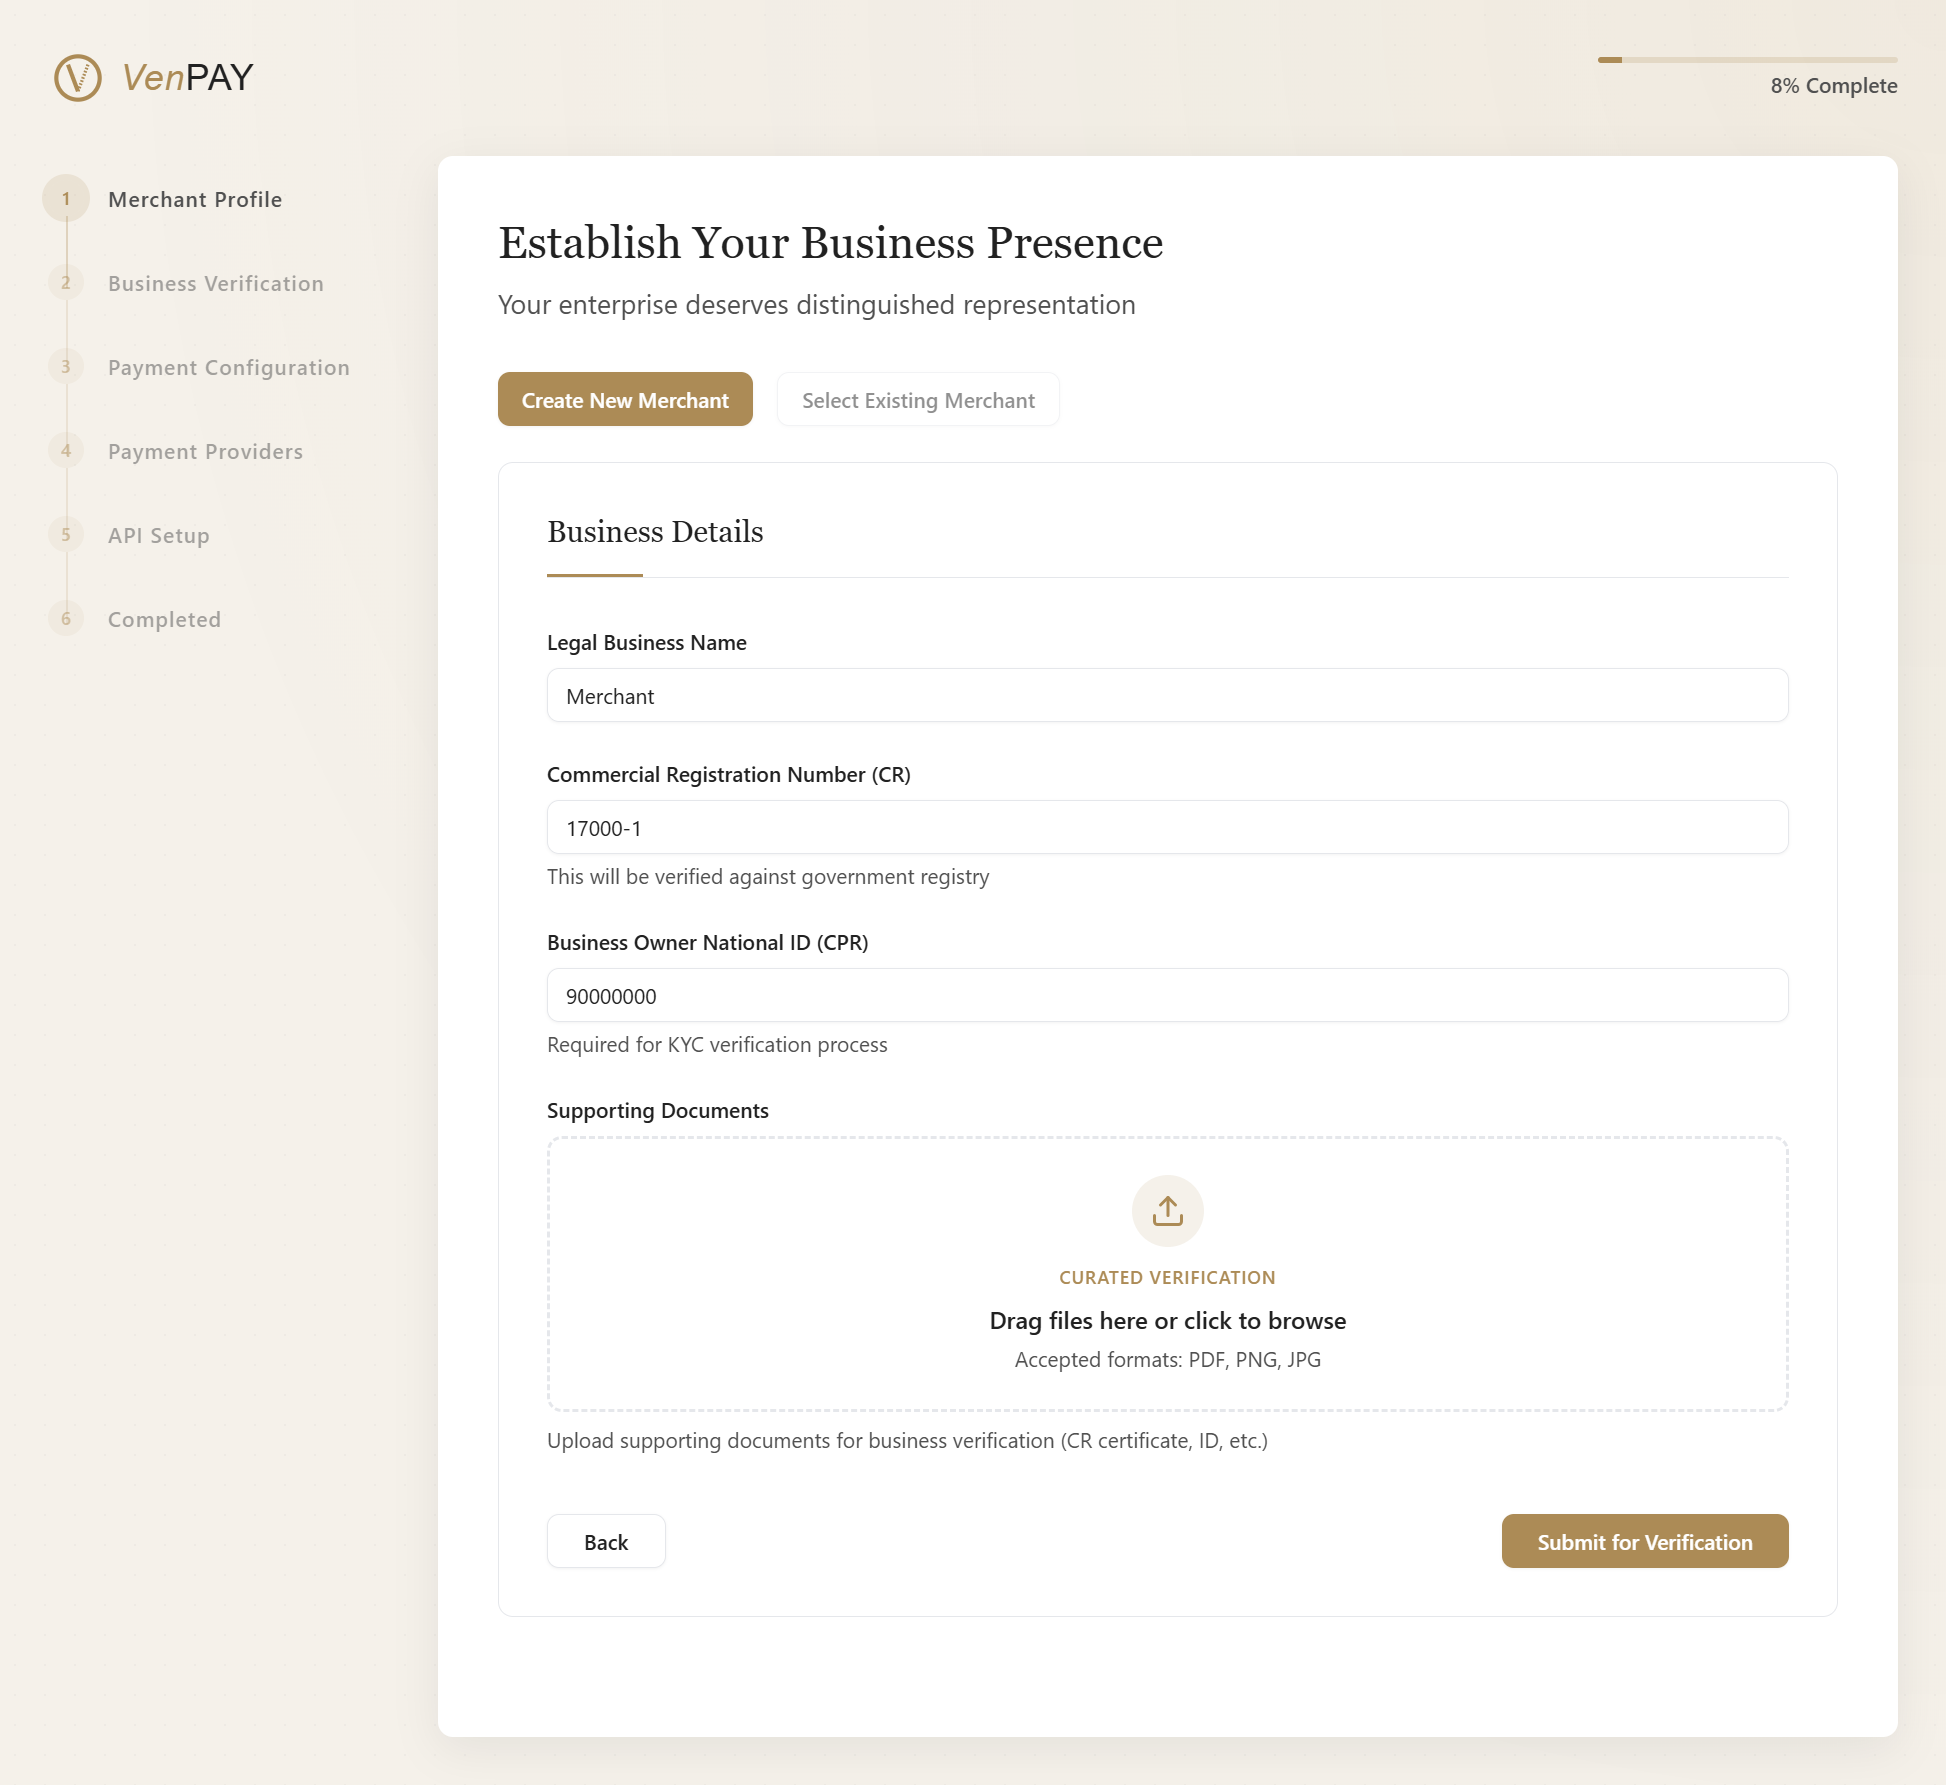
✅ Step 1: Establish Your Business Presence
Your enterprise deserves distinguished representation.
Choose an Option:
- 🔲 Create New Merchant
- 🔲 Select Existing Merchant
📋 Business Details
Provide the following verified information:
| Field | Description |
|---|---|
| Official registered business name | Must match government records |
| Government-issued business identifier | Will be verified against registry |
| Business owner's national ID number | Required for KYC verification |
📁 CURATED VERIFICATION
Drag files here or click to browse
Accepted formats: PDF, PNG, JPG
Examples: Certificate of Registration (CR), National ID, Tax Documents
Upload supporting documents for business verification.
📎 Example: Business License, Passport Copy, Tax ID Certificate
 Upload your official documents to verify your business identity
✅ Step 2: Selected Merchant: config
🔧 Change
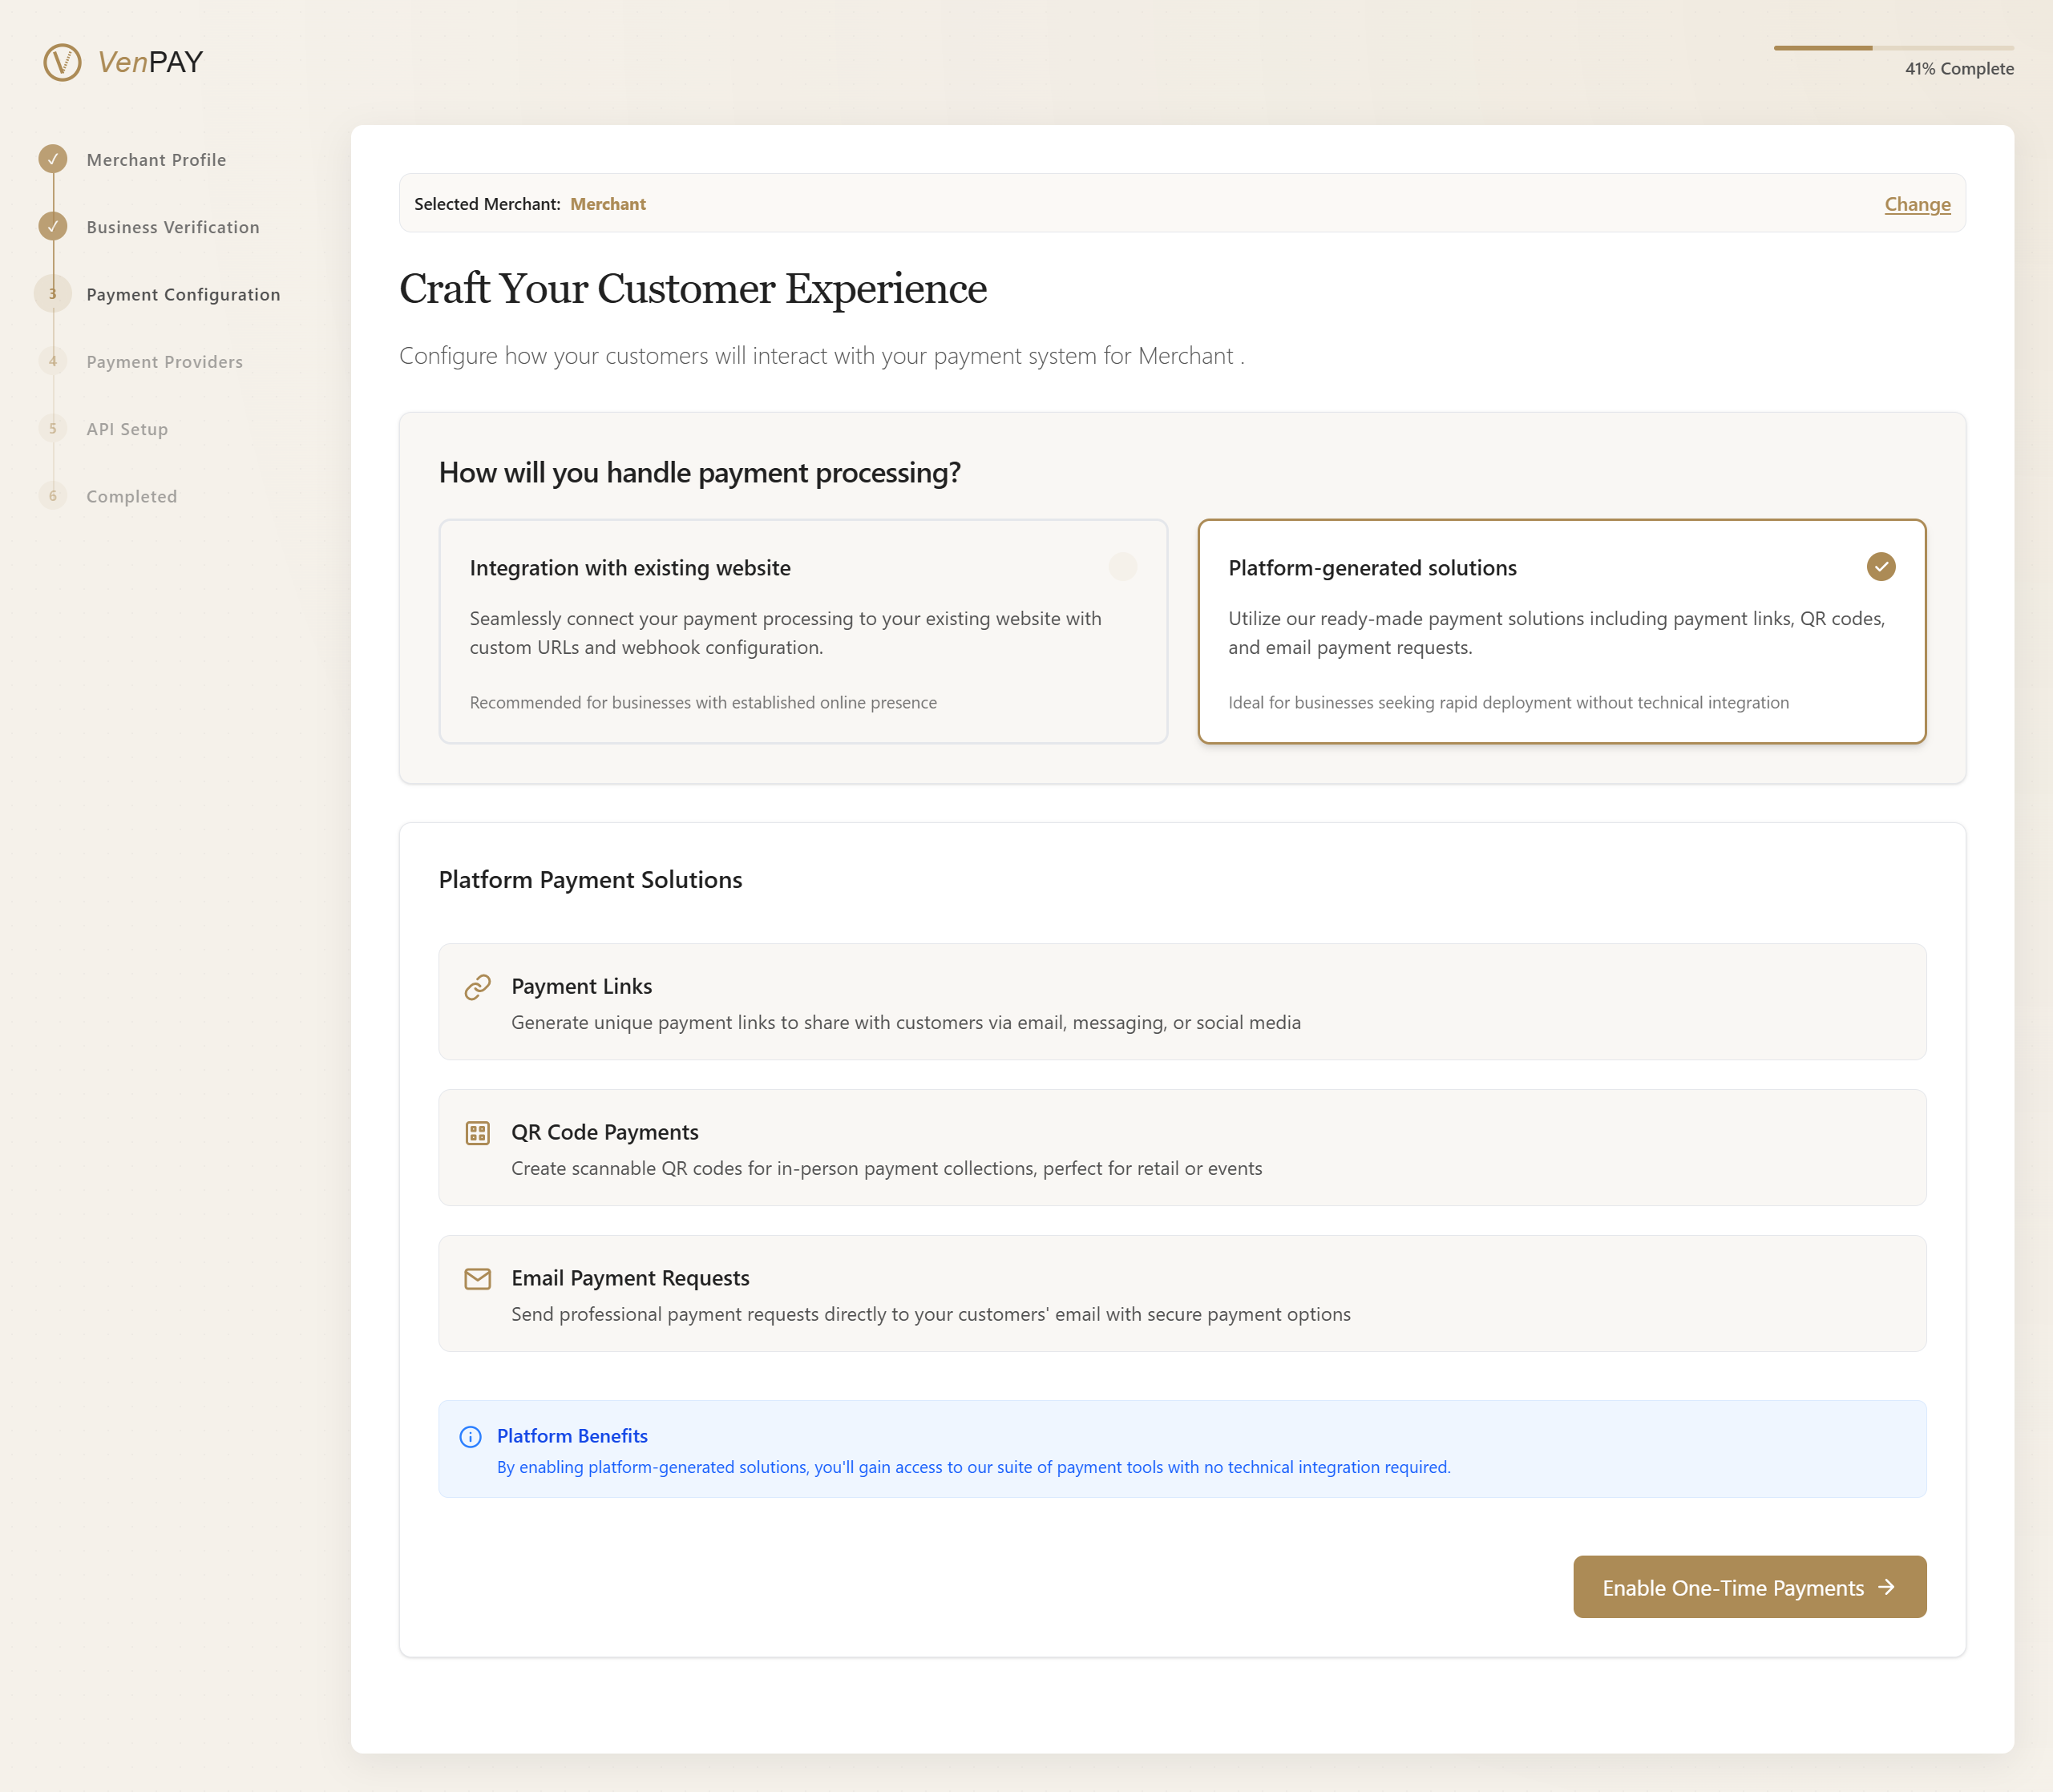
🎨 Craft Your Customer Experience
Configure how your customers will interact with your payment system.
Choose one of the following options based on your business needs:
🌐 Option A: Integrate with Existing Website
Seamlessly connect your payment processing to your existing website with custom URLs and webhook configuration.
Recommended for: Businesses with an established online presence
Integration Details
- Set up custom success/failure redirect URLs
- Configure webhooks for real-time payment updates
- Use SDKs or API calls to initialize payments
// Initialize payment with your API key
const vpay = new VPay('a718adcgb48');


// Create a payment session
vpay.createSession({
  amount: 100.00,
  currency: 'USD',
  description: 'Premium Plan Subscription',
  customerEmail: 'customer@example.com',
  successUrl: 'https://your-website.com/success ',
  failureUrl: 'https://your-website.com/failure '
})
  .then(response => window.location = response.checkoutUrl)
  .catch(error => console.error('Payment initialization failed:', error));
🧩 Option B: Platform-Generated Solutions
Utilize our ready-made payment tools with no technical integration required.
Ideal for: Businesses seeking rapid deployment without development overhead
Available Tools
- 💬 Payment Links: Generate unique payment links to share via email, messaging, or social media
- 📷 QR Code Payments: Create scannable QR codes for in-person collections (perfect for retail or events)
- 📧 Email Payment Requests: Send professional payment requests directly to your customers' inbox
Platform Benefits
By enabling platform-generated solutions, you gain access to:
- Instant payment page generation
- Pre-built UI for secure checkout
- Built-in analytics and tracking
 Quick setup using VPAY’s built-in payment tools
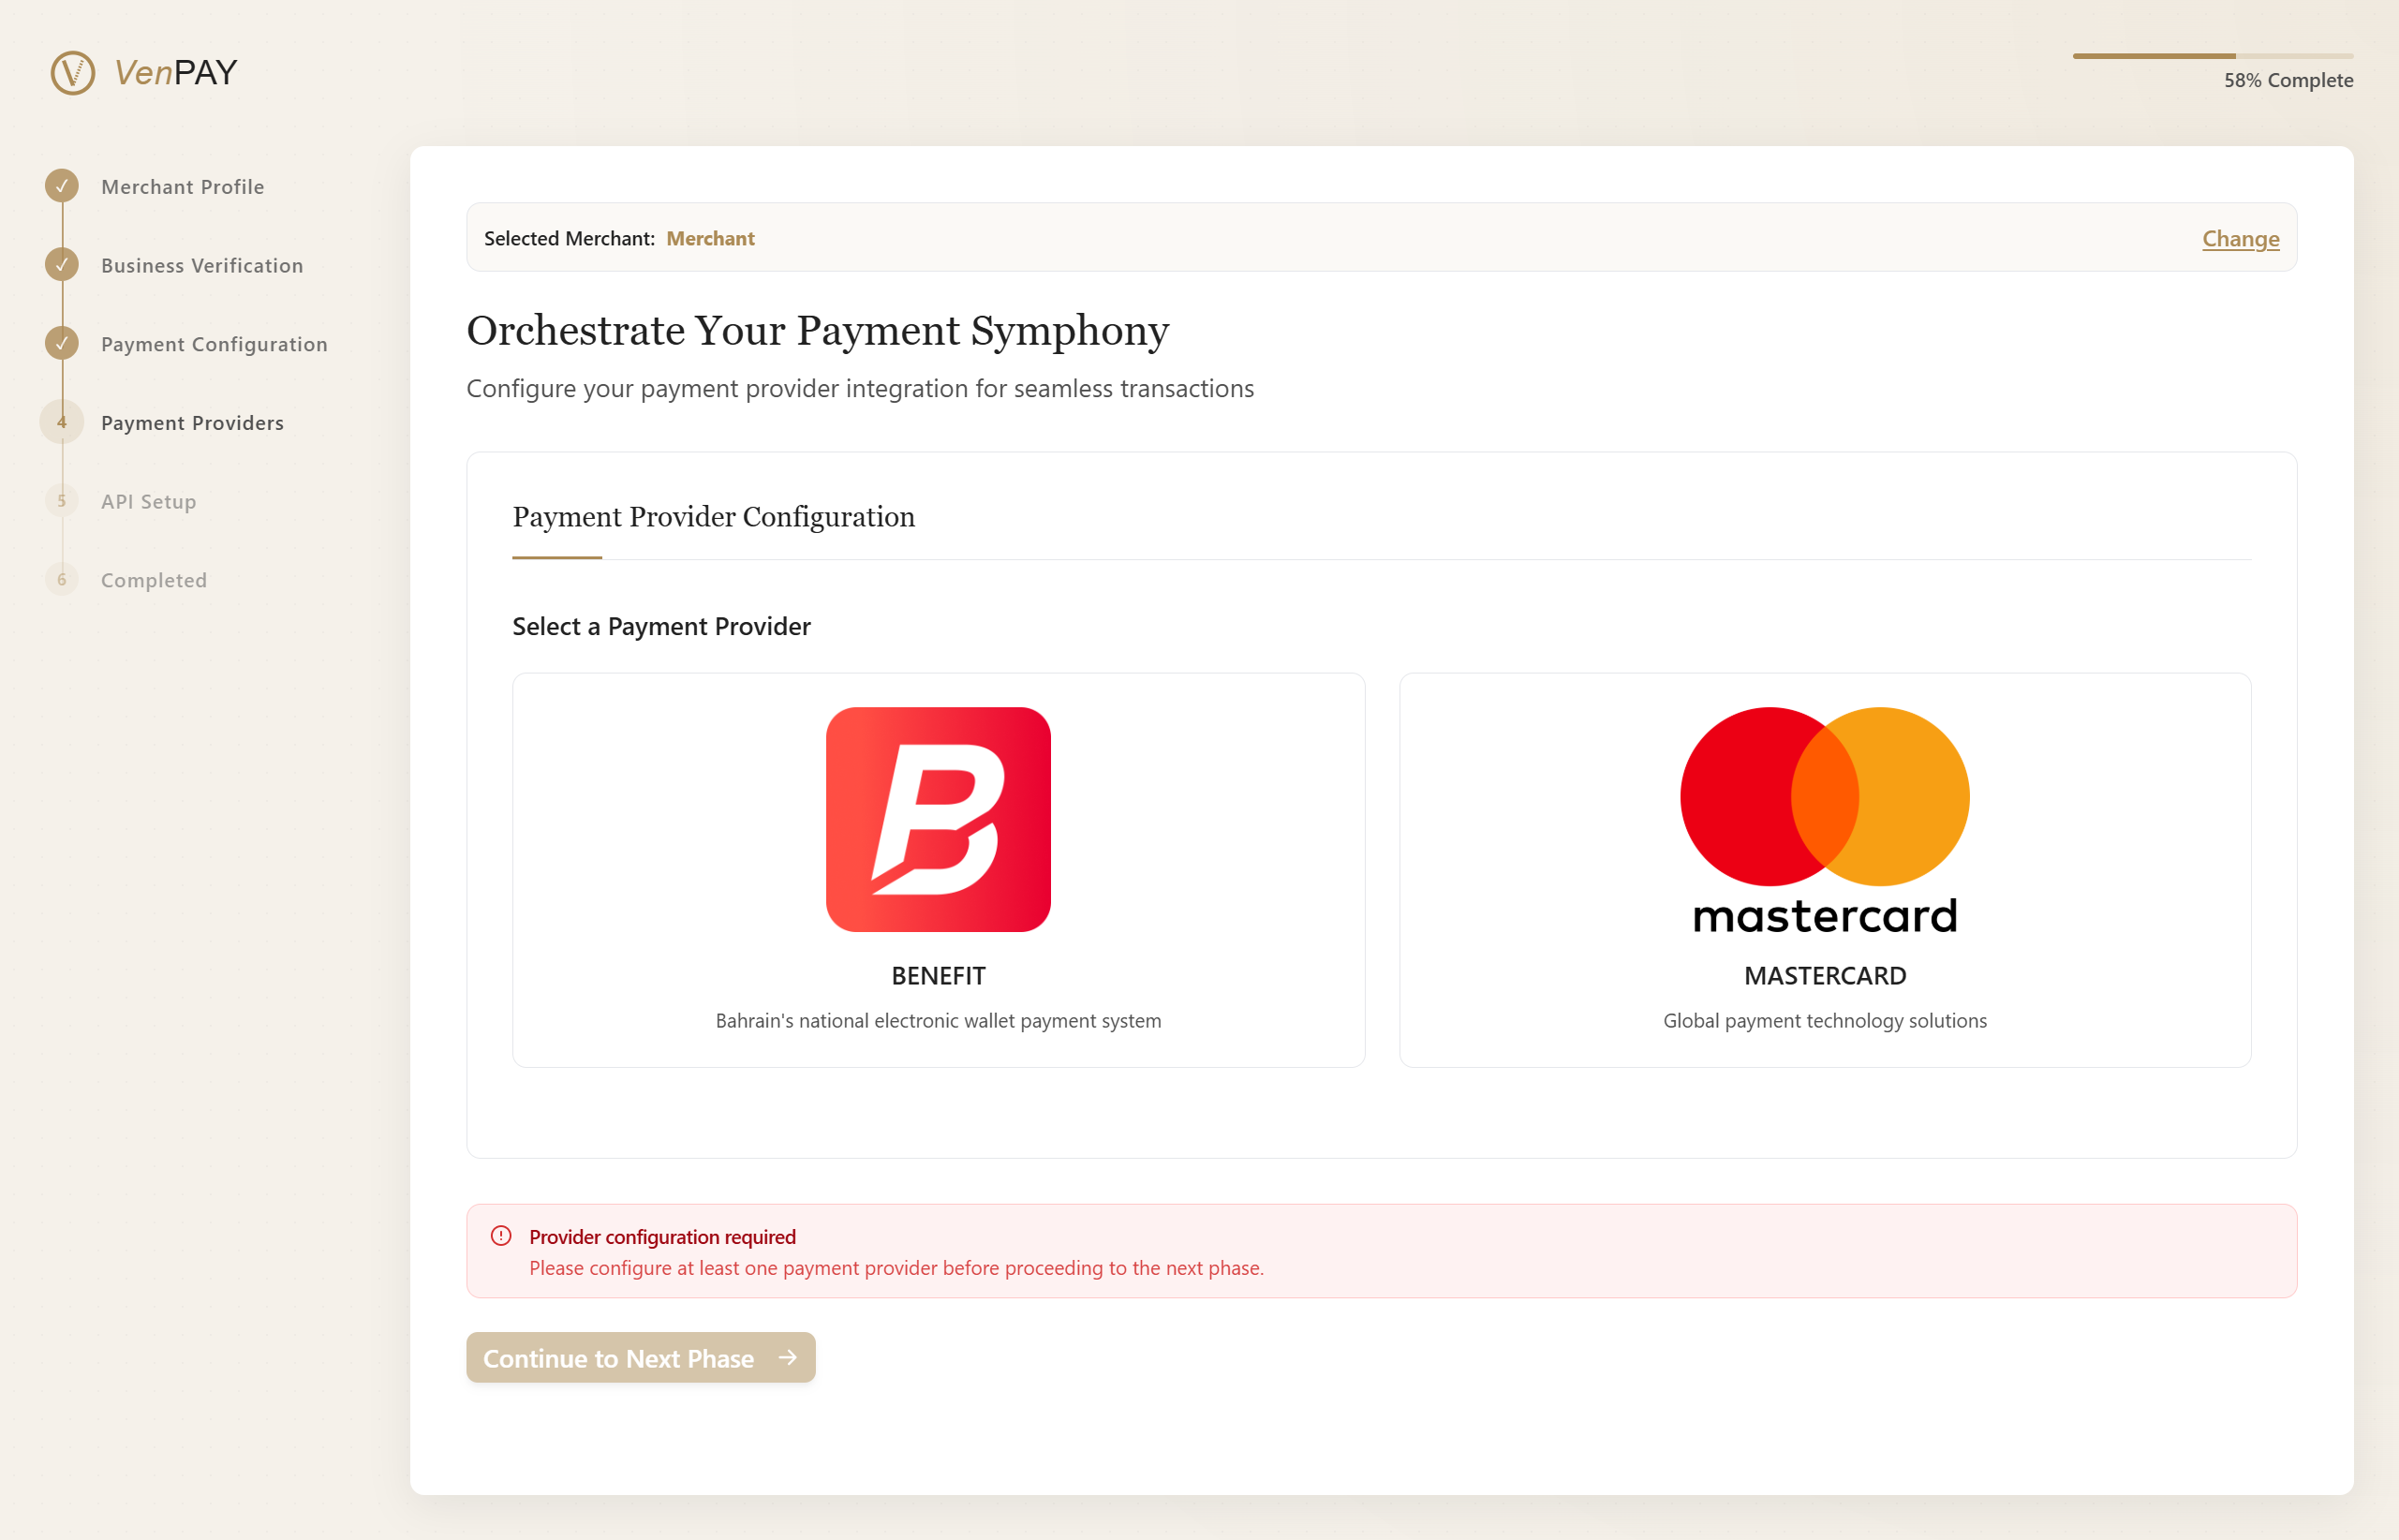
🔧 Step 3: Select a Payment Provider
Choose your preferred payment gateway to enable seamless transactions.
This step determines how payments will be processed and settled into your account.
🧭 Choose Your Payment Gateway
You can integrate with one of the following global payment providers:
💳 Option A: Benefit Payment Gateway
BENEFIT – Bahrain's national electronic wallet payment system
Select a payment provider to begin configuration
🔐 Benefit Integration Setup
Do you already have credentials?
🔲 I'm setting up a new integration
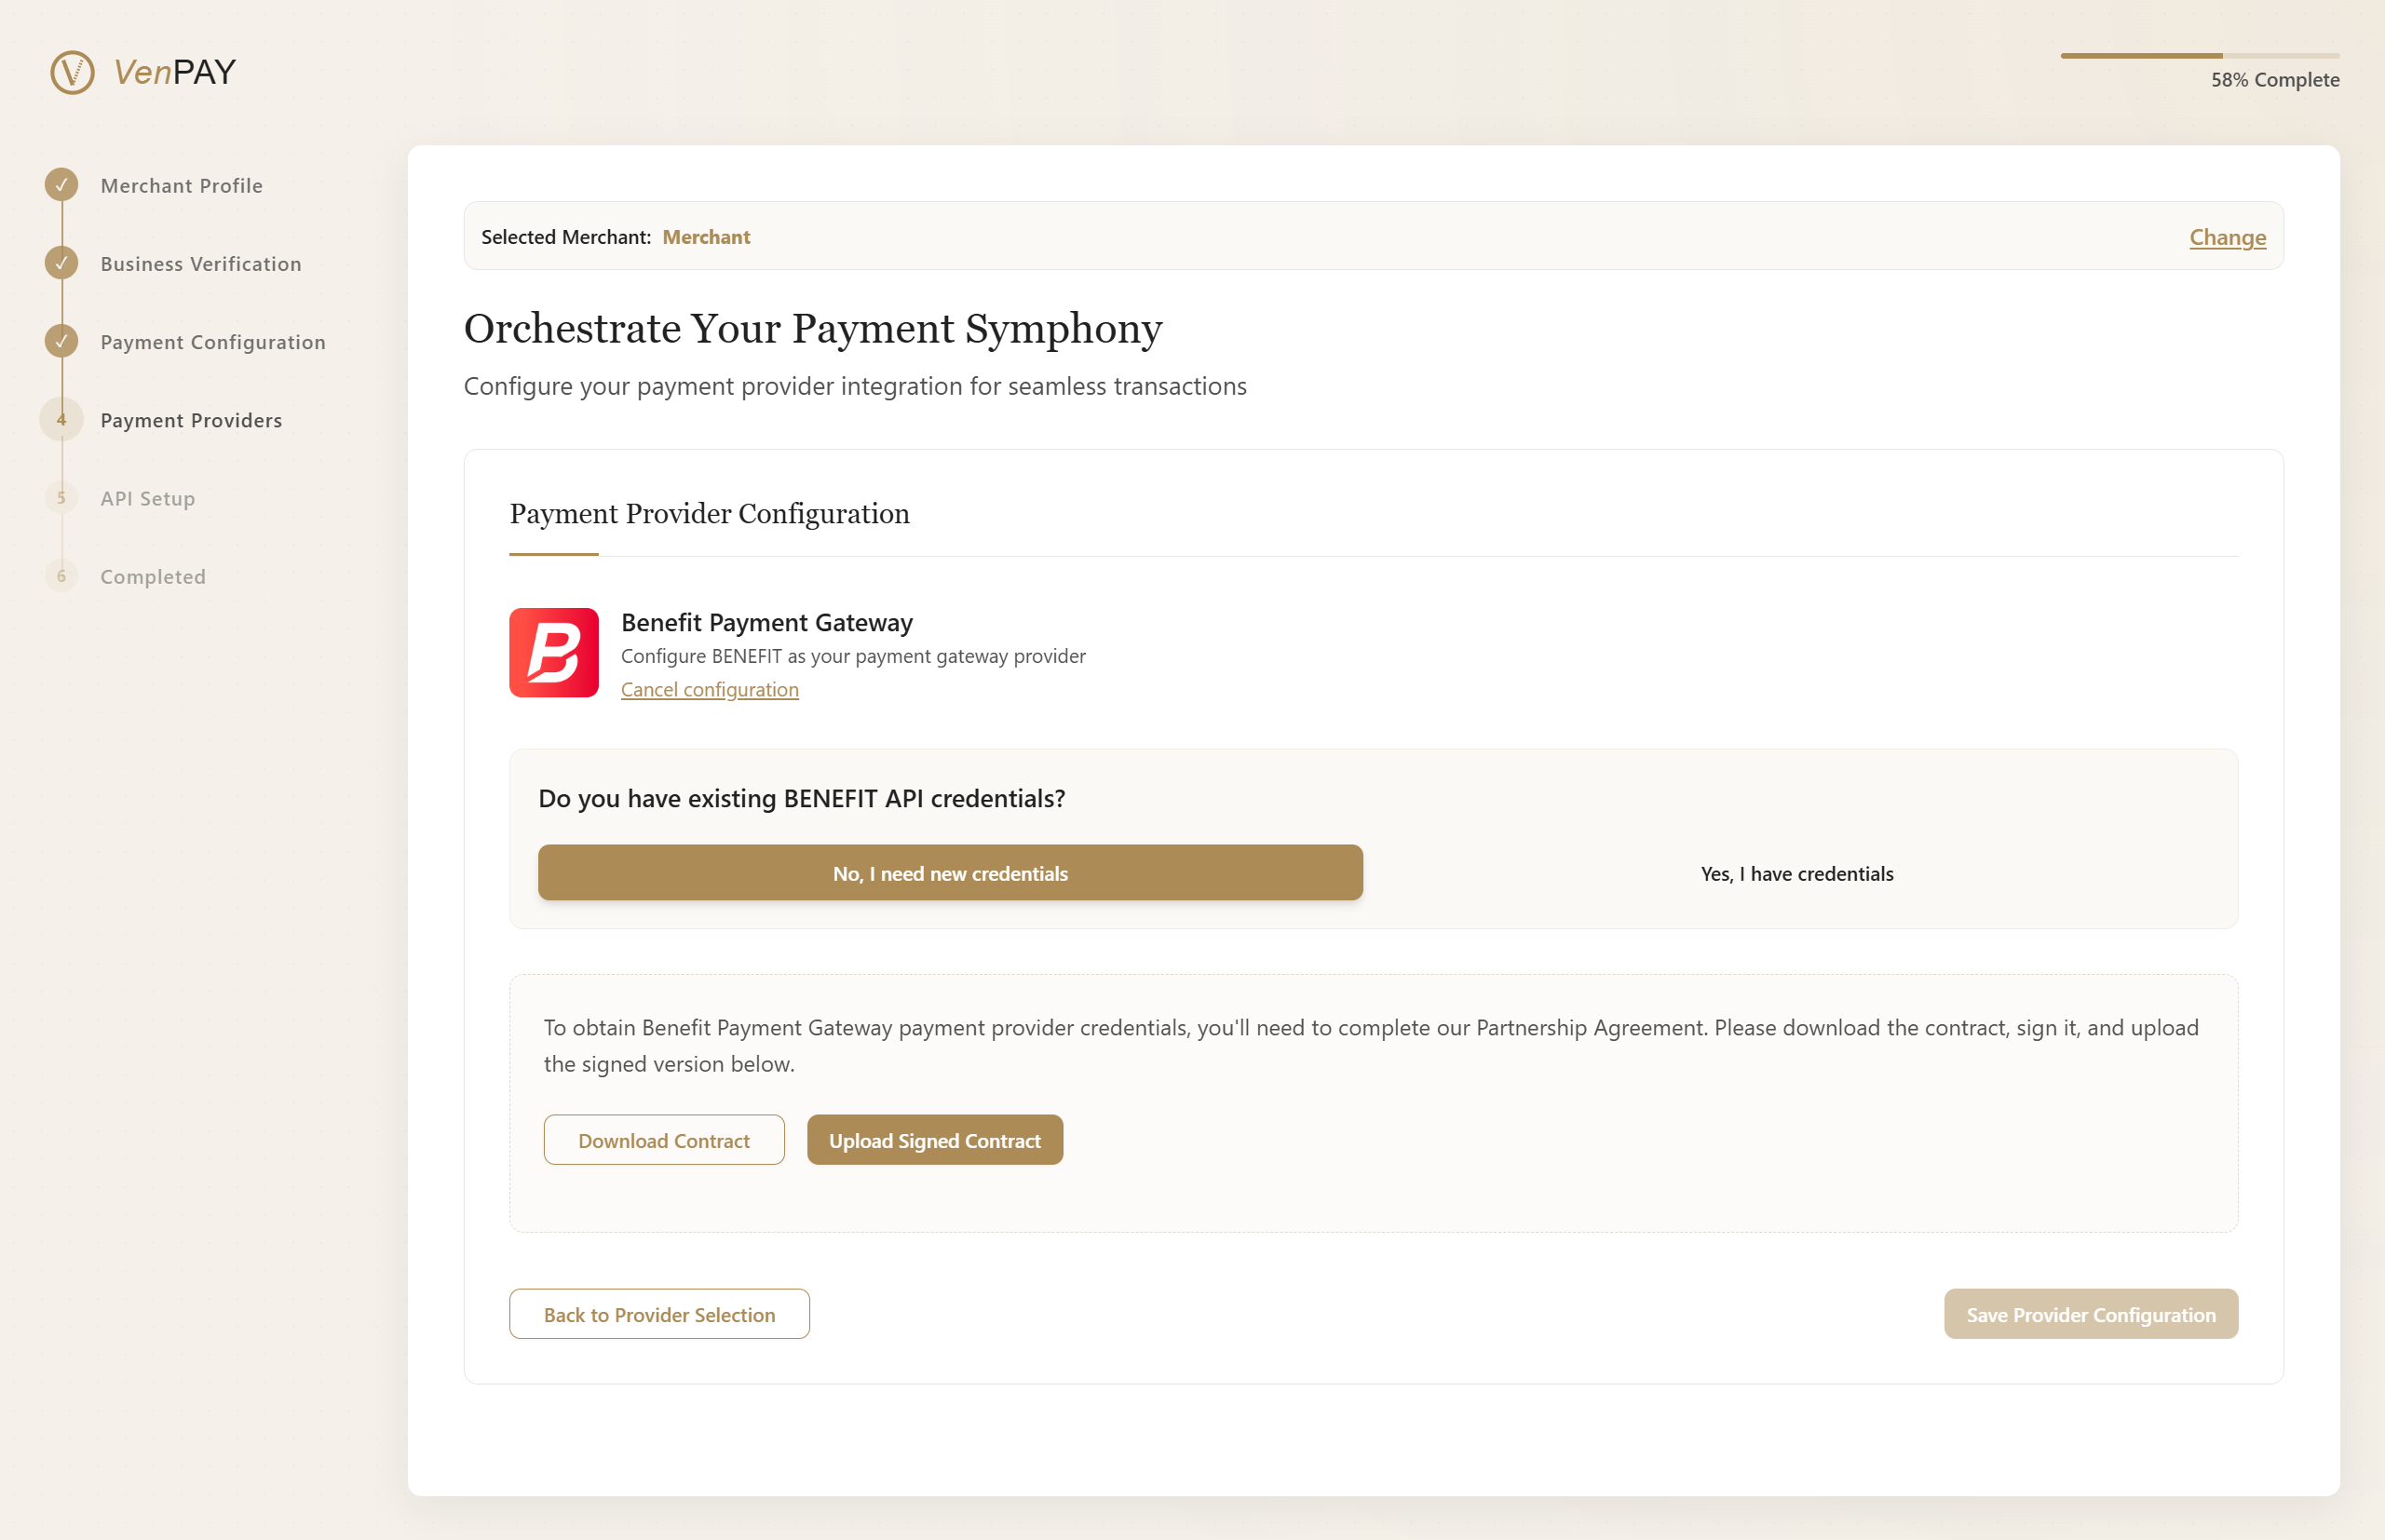
Generate new credentials via the BENEFIT portal- Follow on-screen instructions to register your merchant
- Generate your:
- TranPortal ID
- TranPortal Password
- Resource Key
🔲 I already have existing credentials
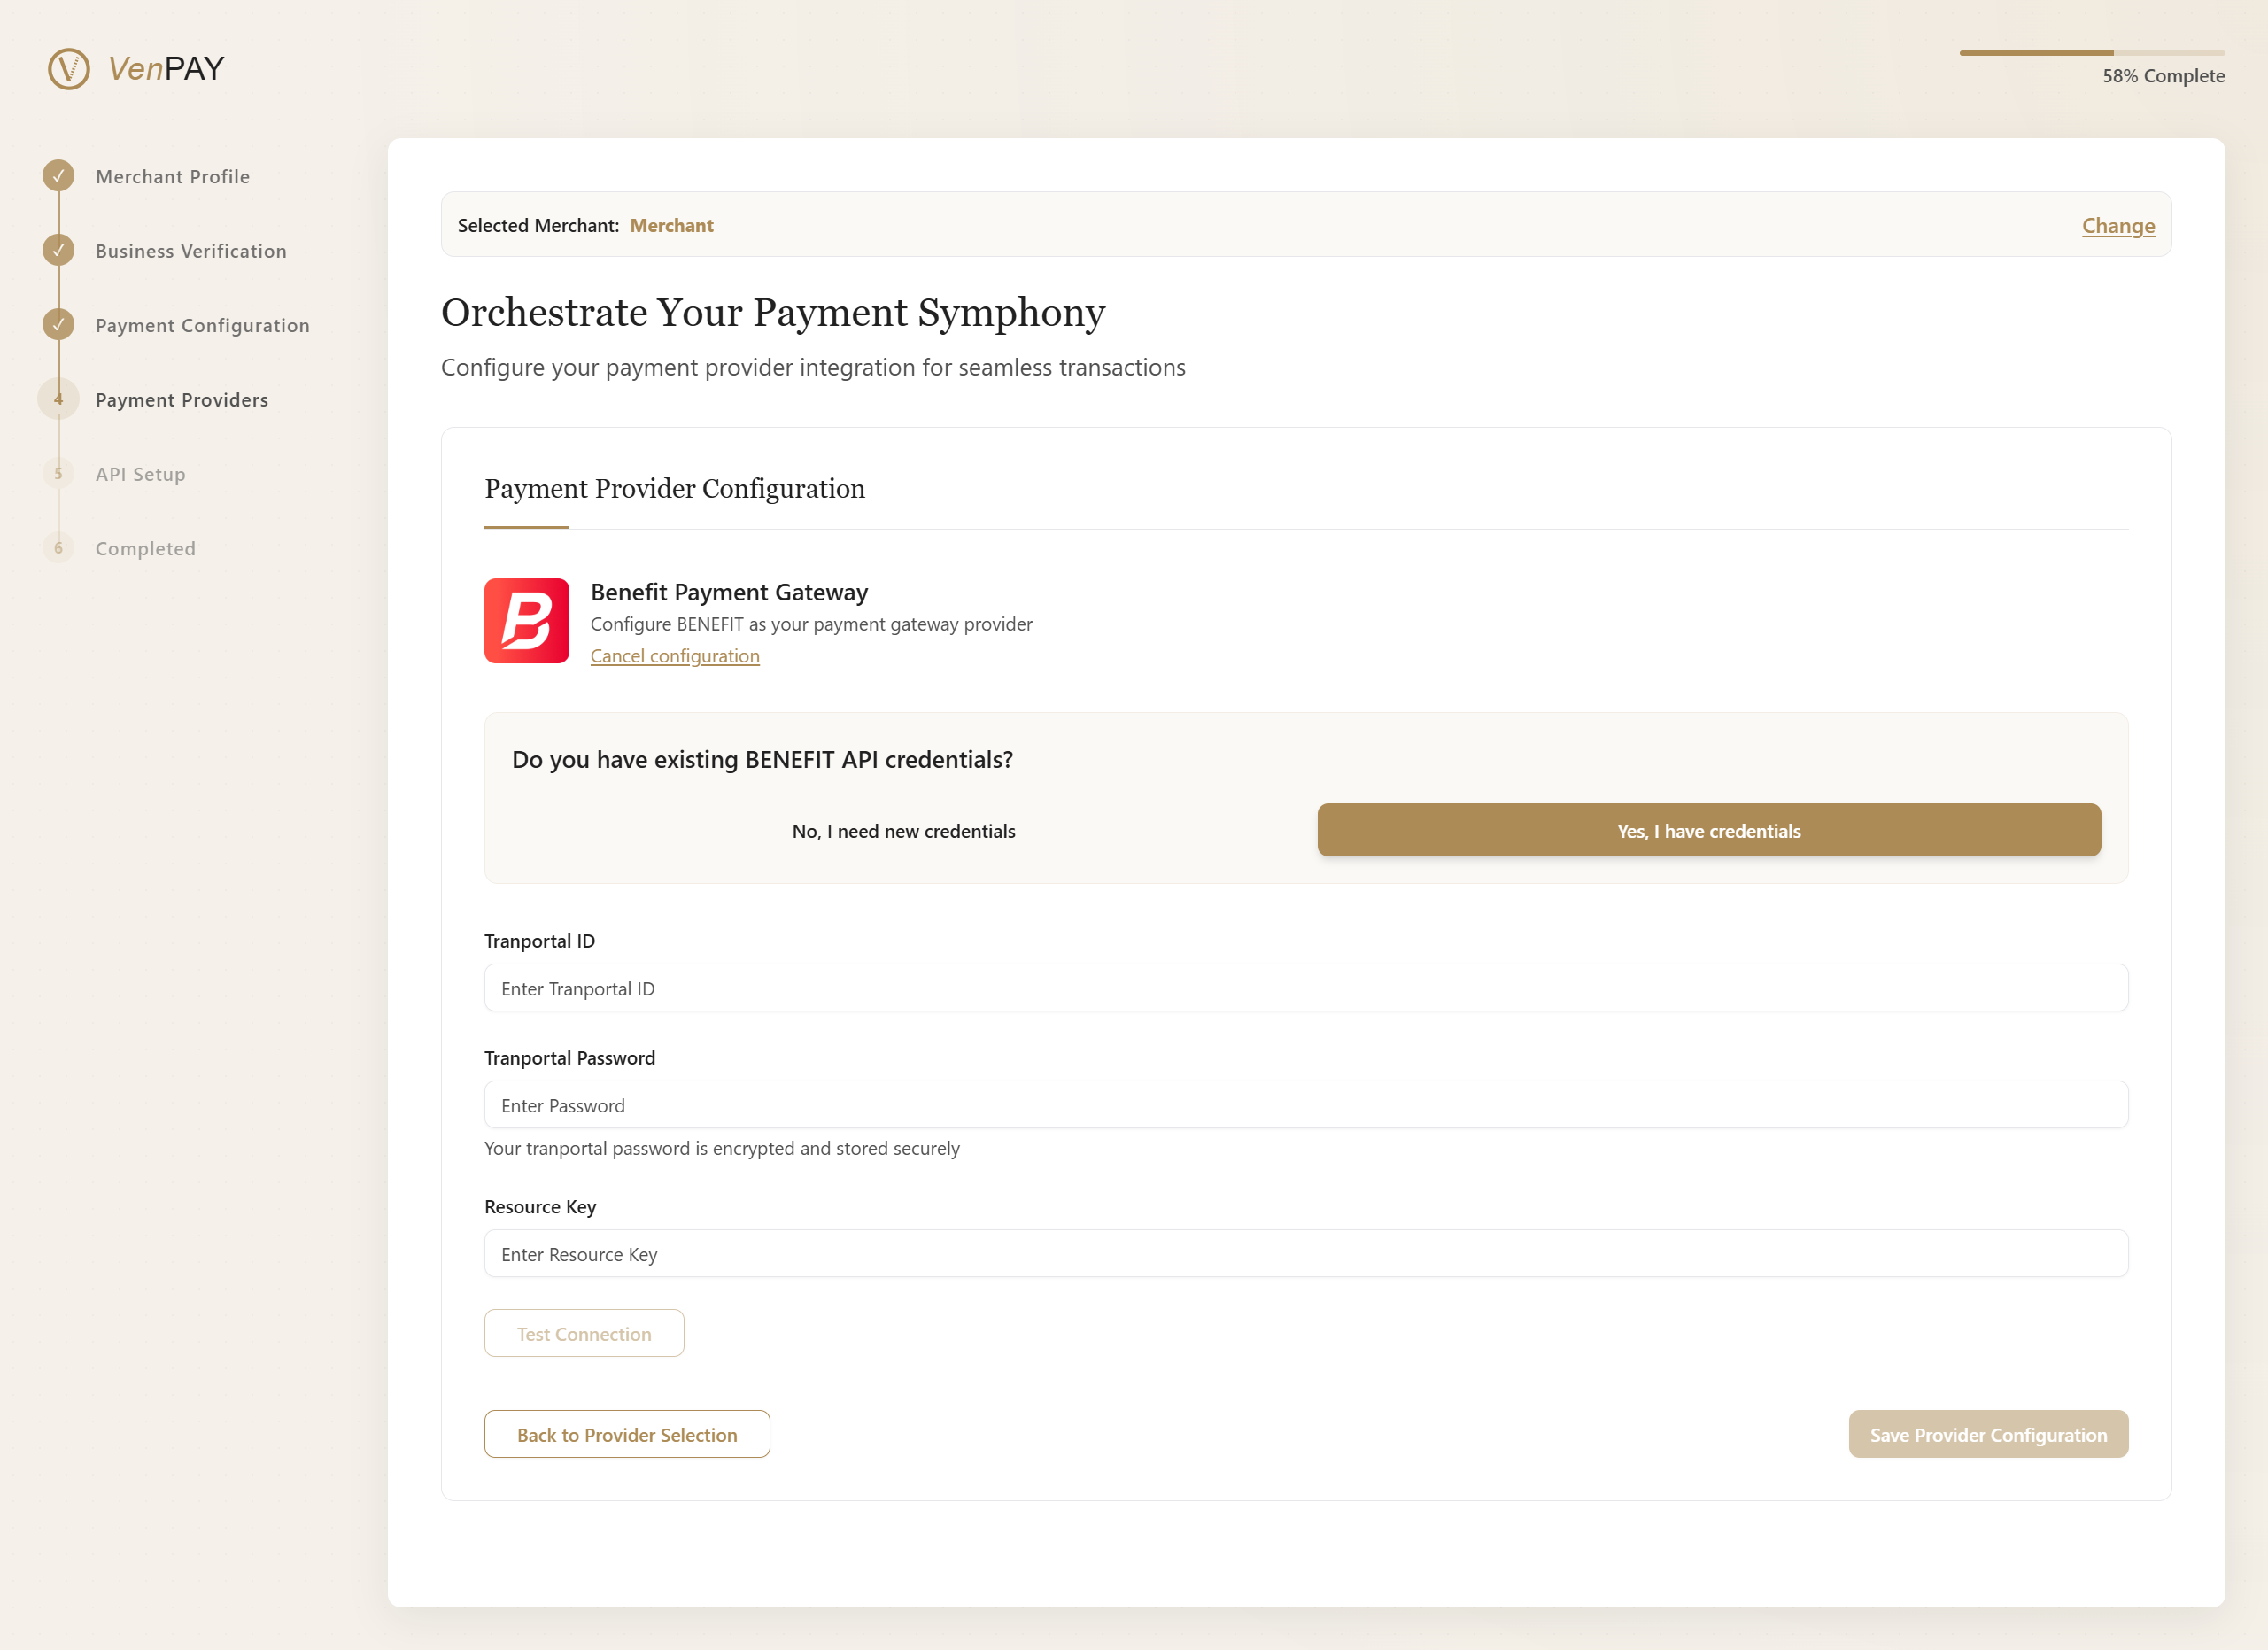
Enter your current credentials below:- TranPortal ID
- TranPortal Password
- Resource Key
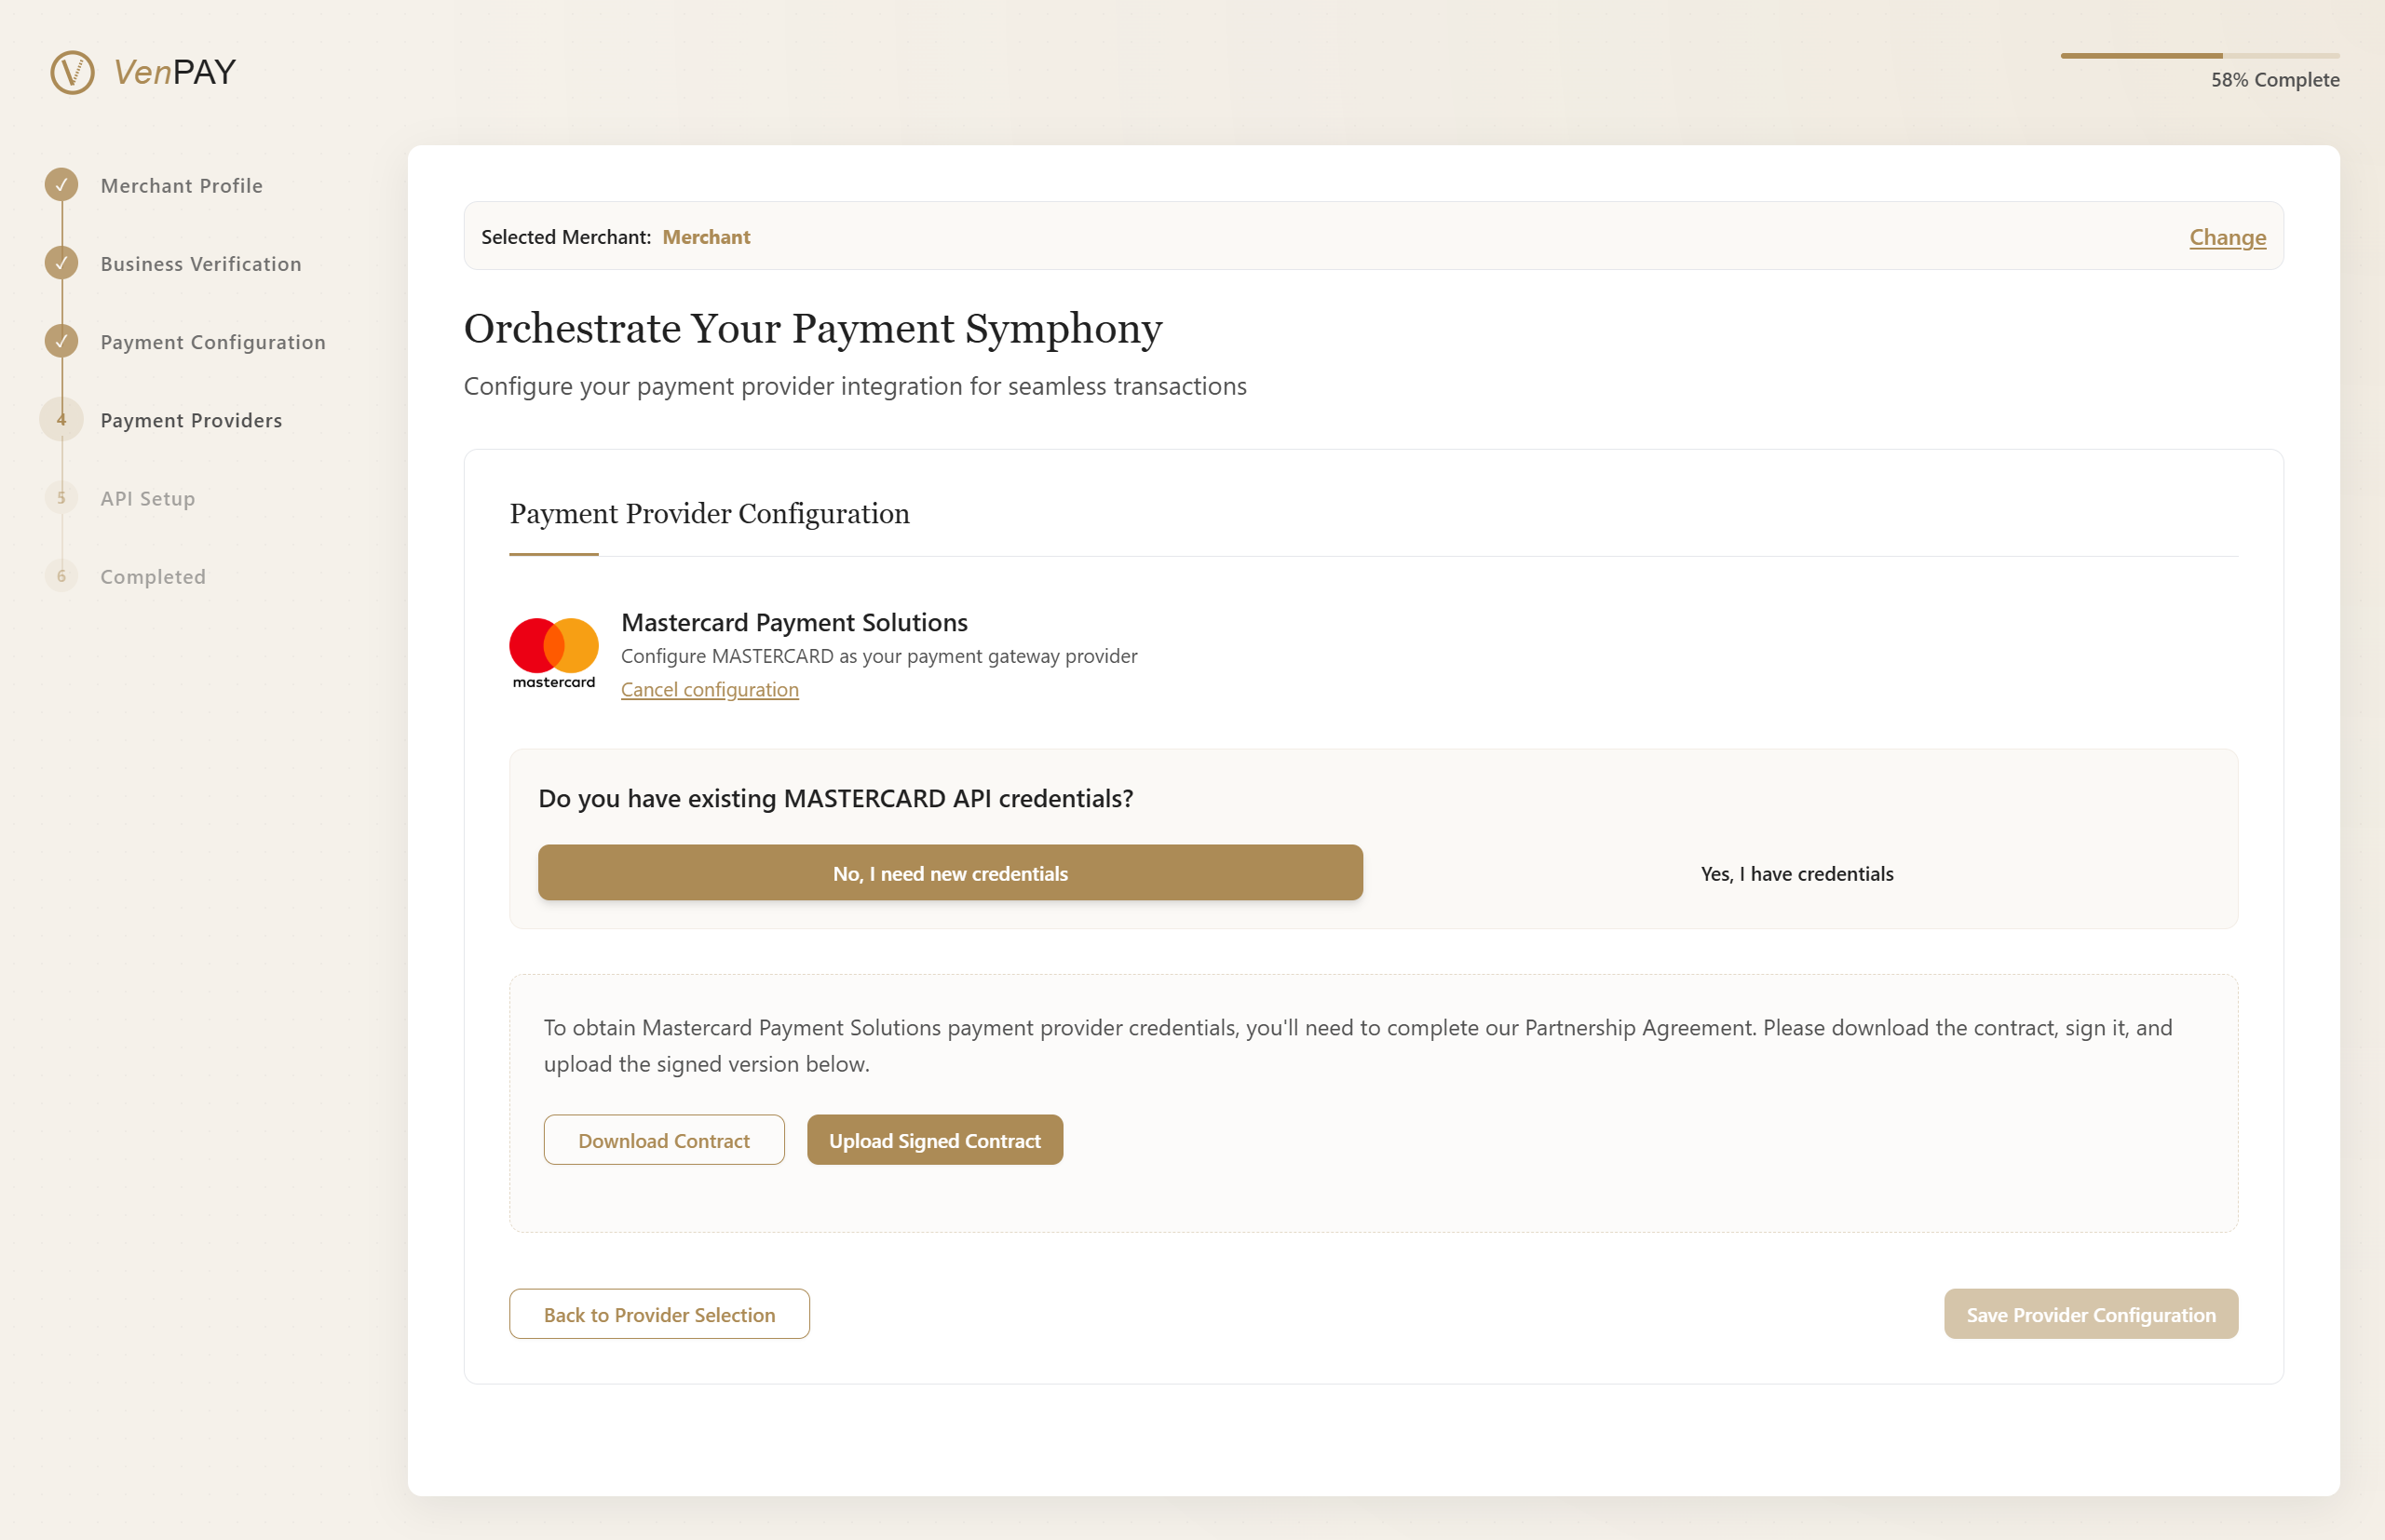
💼 Option B: Mastercard Payment Solutions
MASTERCARD – Global payment technology solutions
Begin setup for Mastercard integration
🔒 Mastercard Integration Setup
Do you already have credentials?
🔲 I'm setting up a new integration
Follow instructions to generate new API keys and merchant credentials🔲 I already have existing credentials
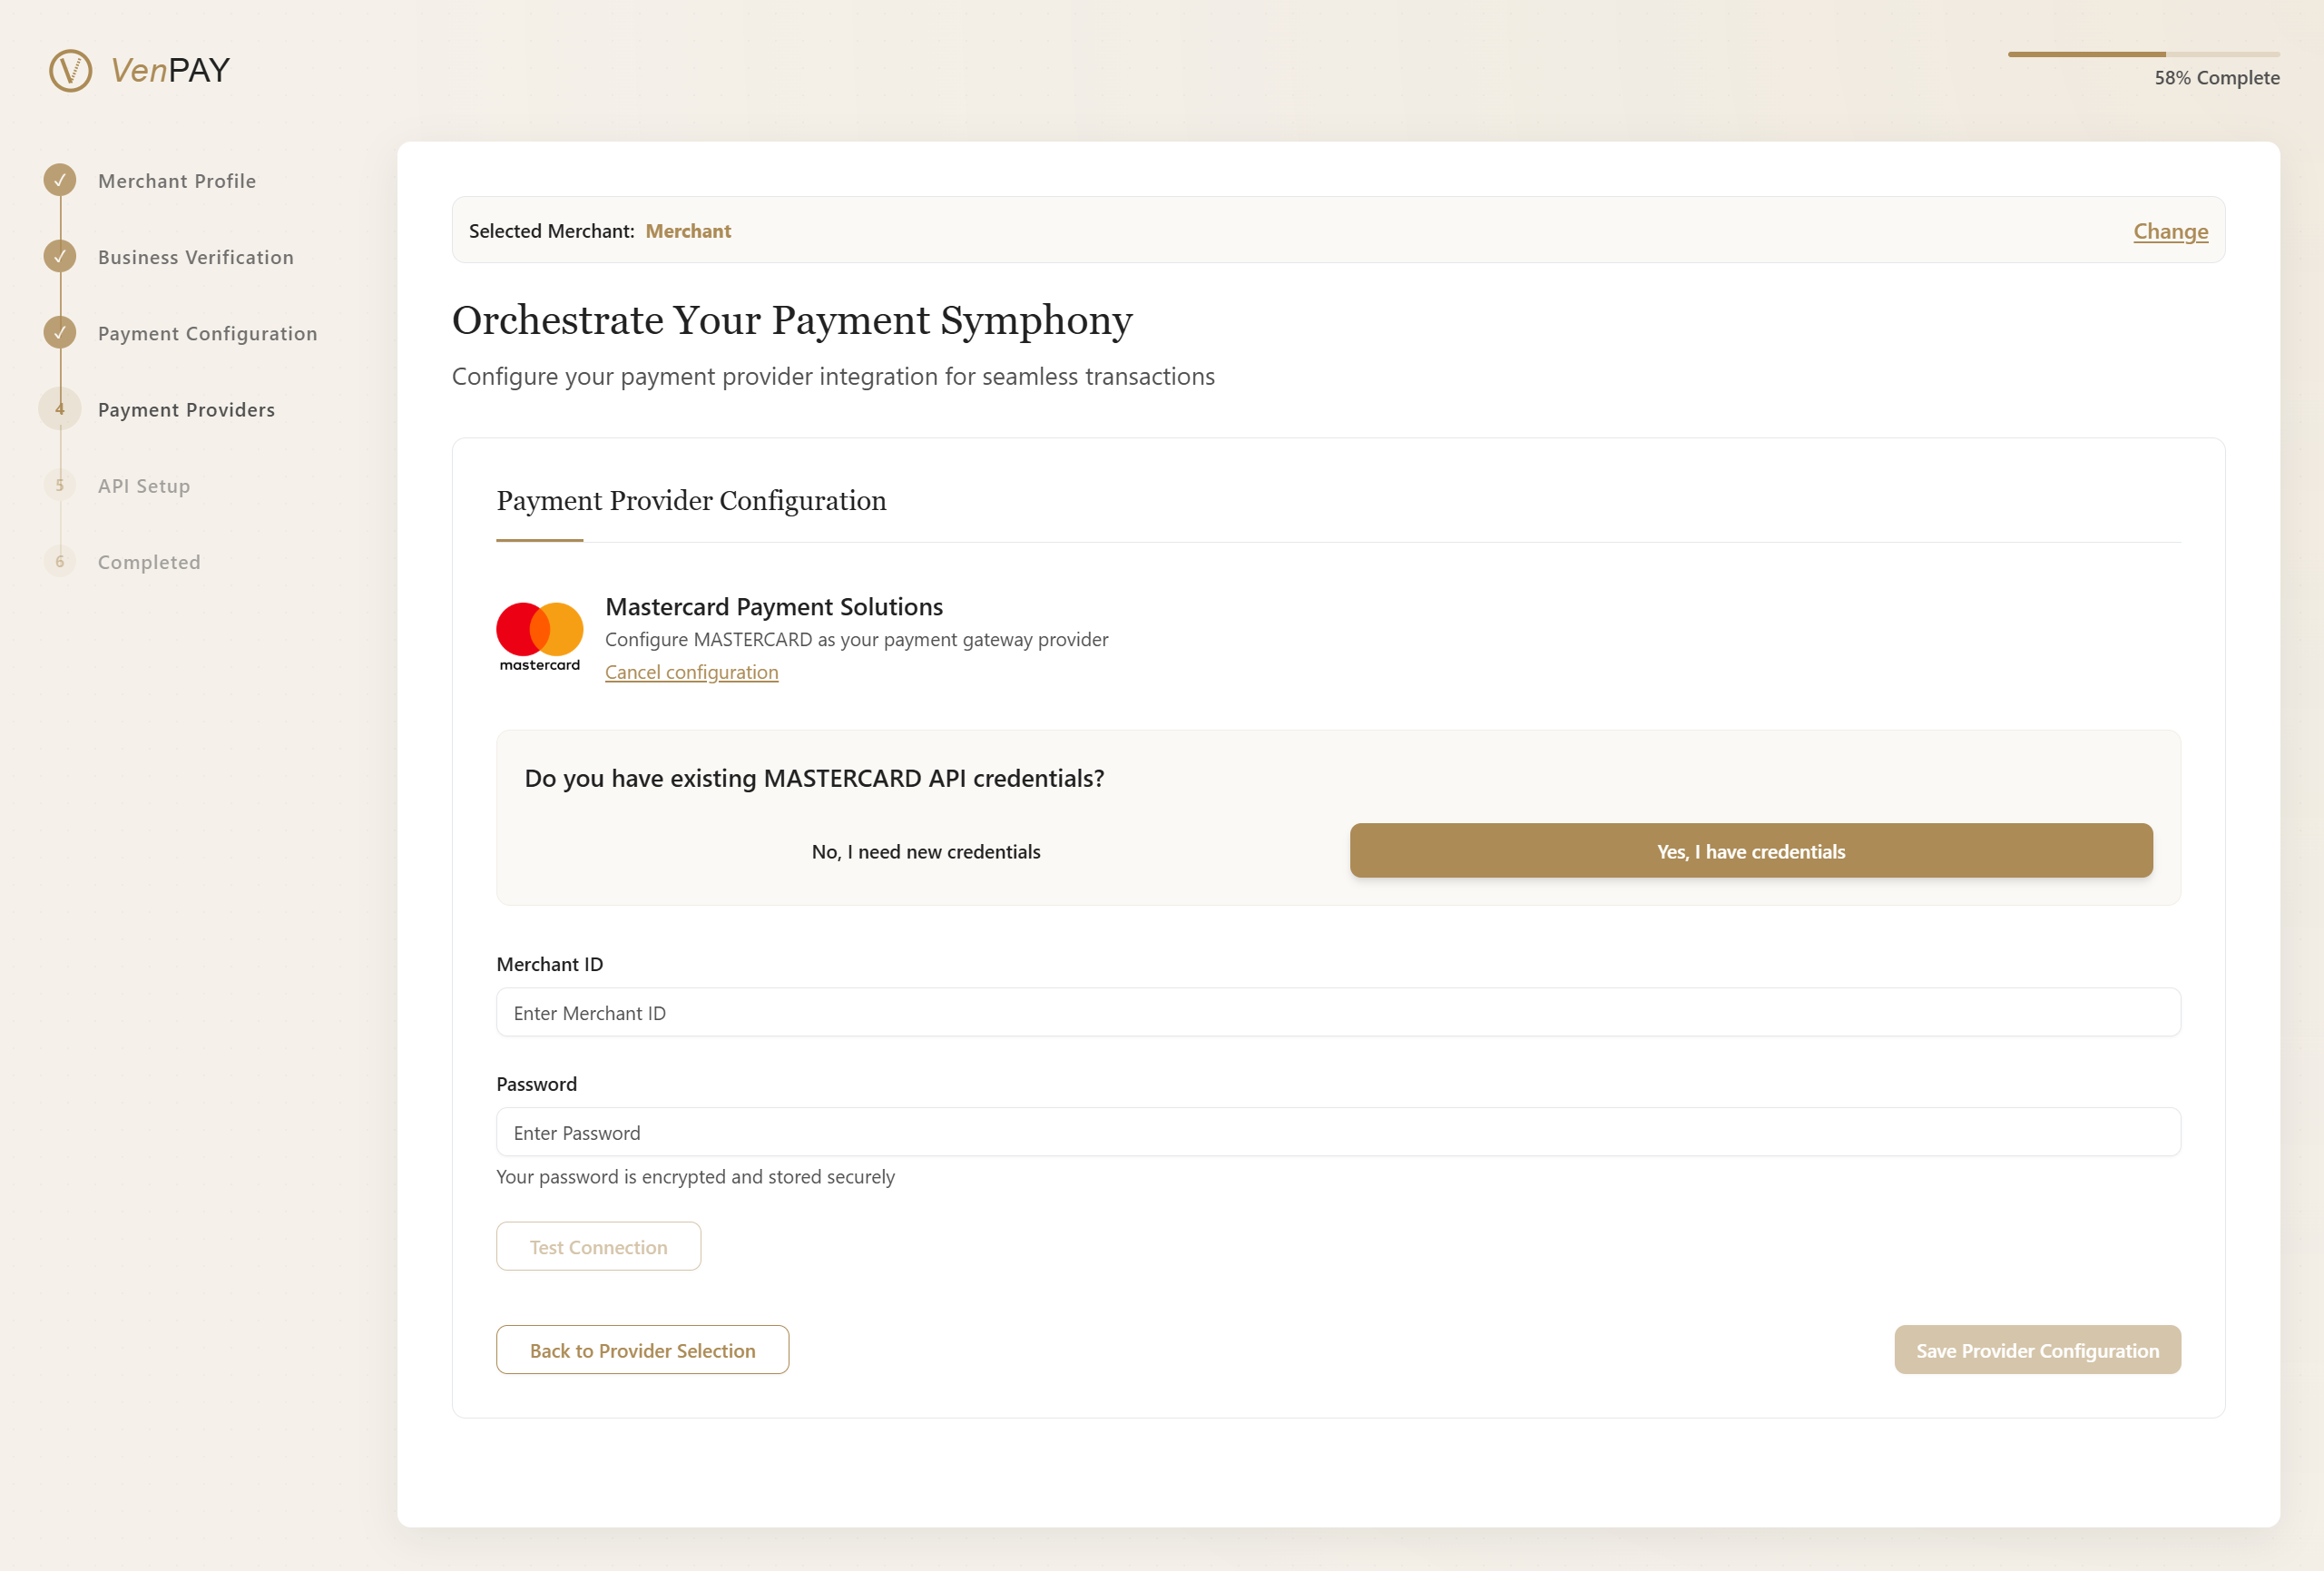
Enter your current credentials below:- Merchant ID
- Password
✅ Next Step
Once you've configured your payment provider, click Continue to proceed to the next phase of onboarding.
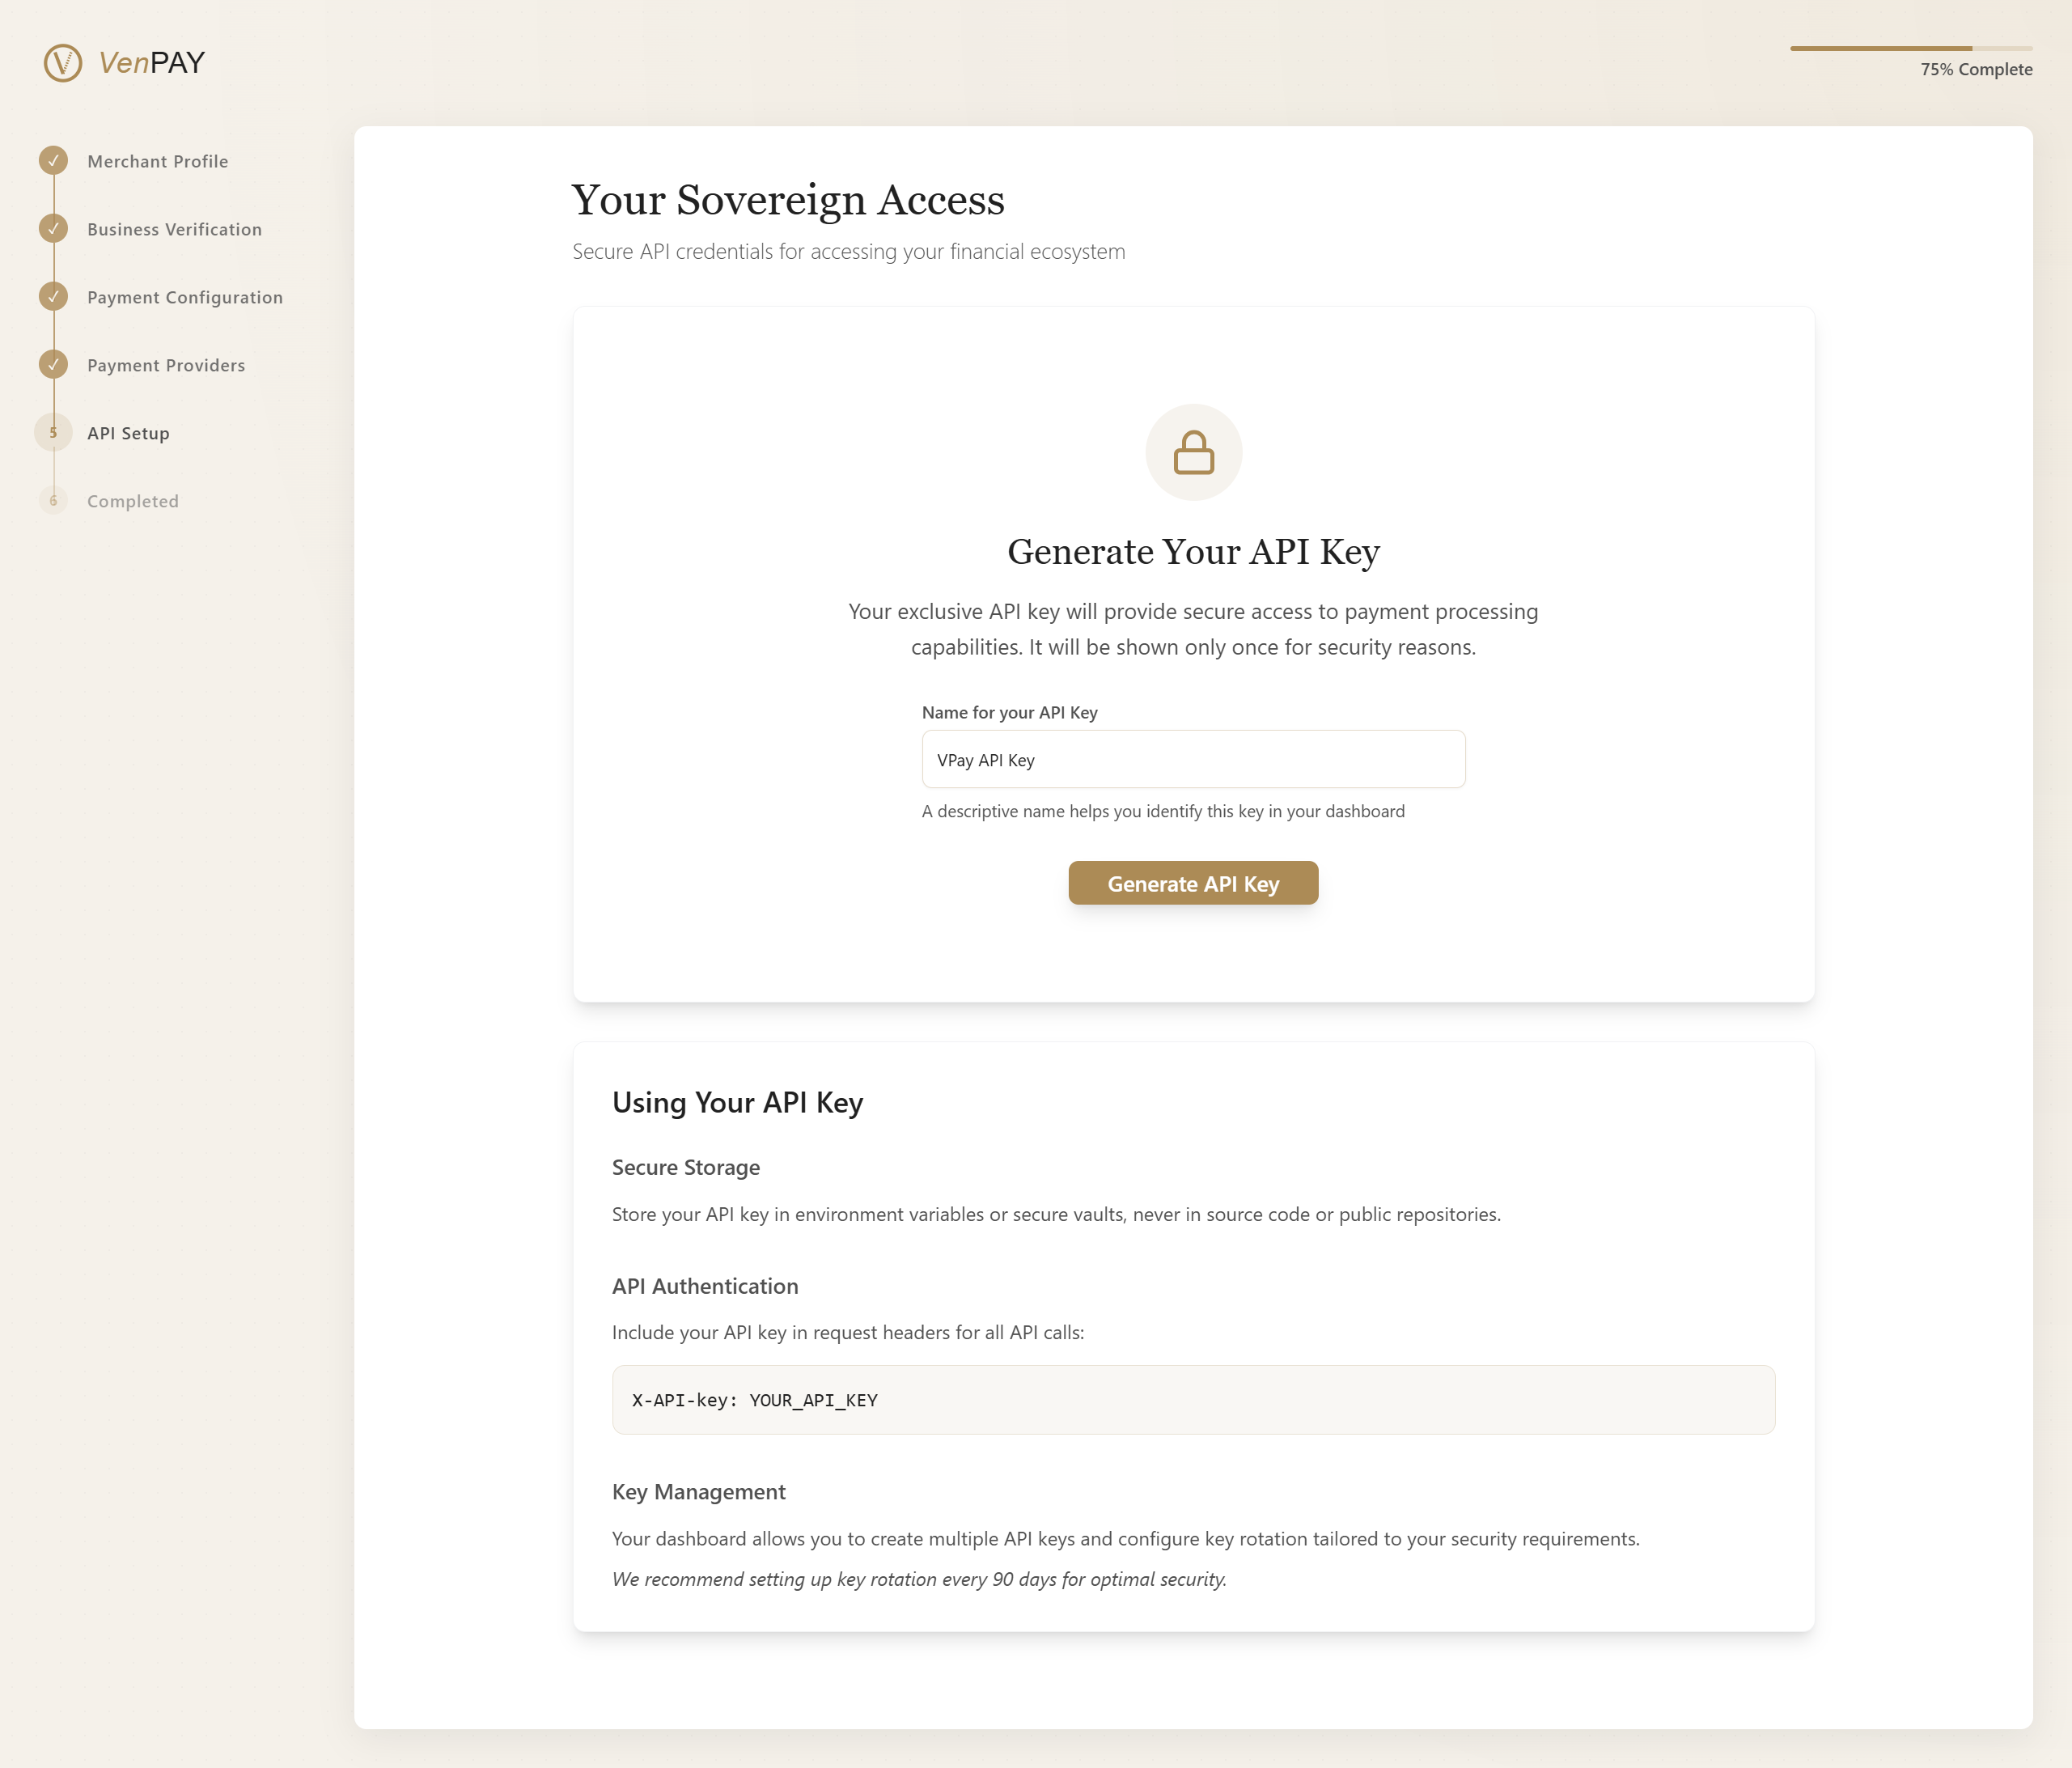
🔐 Step 4: Secure Your API Credentials
Your merchant account has been successfully configured. Now it's time to generate your API credentials, which will allow your system to securely communicate with VPAY services.
⚠️ Important: This API key will be shown only once. If lost, it cannot be recovered.
🧩 Generate Your API Key
Before generating your key, review your configuration to ensure all previous steps have been completed successfully.
Review your settings before proceeding to generate the API key
🔑 Generate & View Your API Key
Click Generate API Key to create your unique access token.
Once generated, you will see a screen like this:
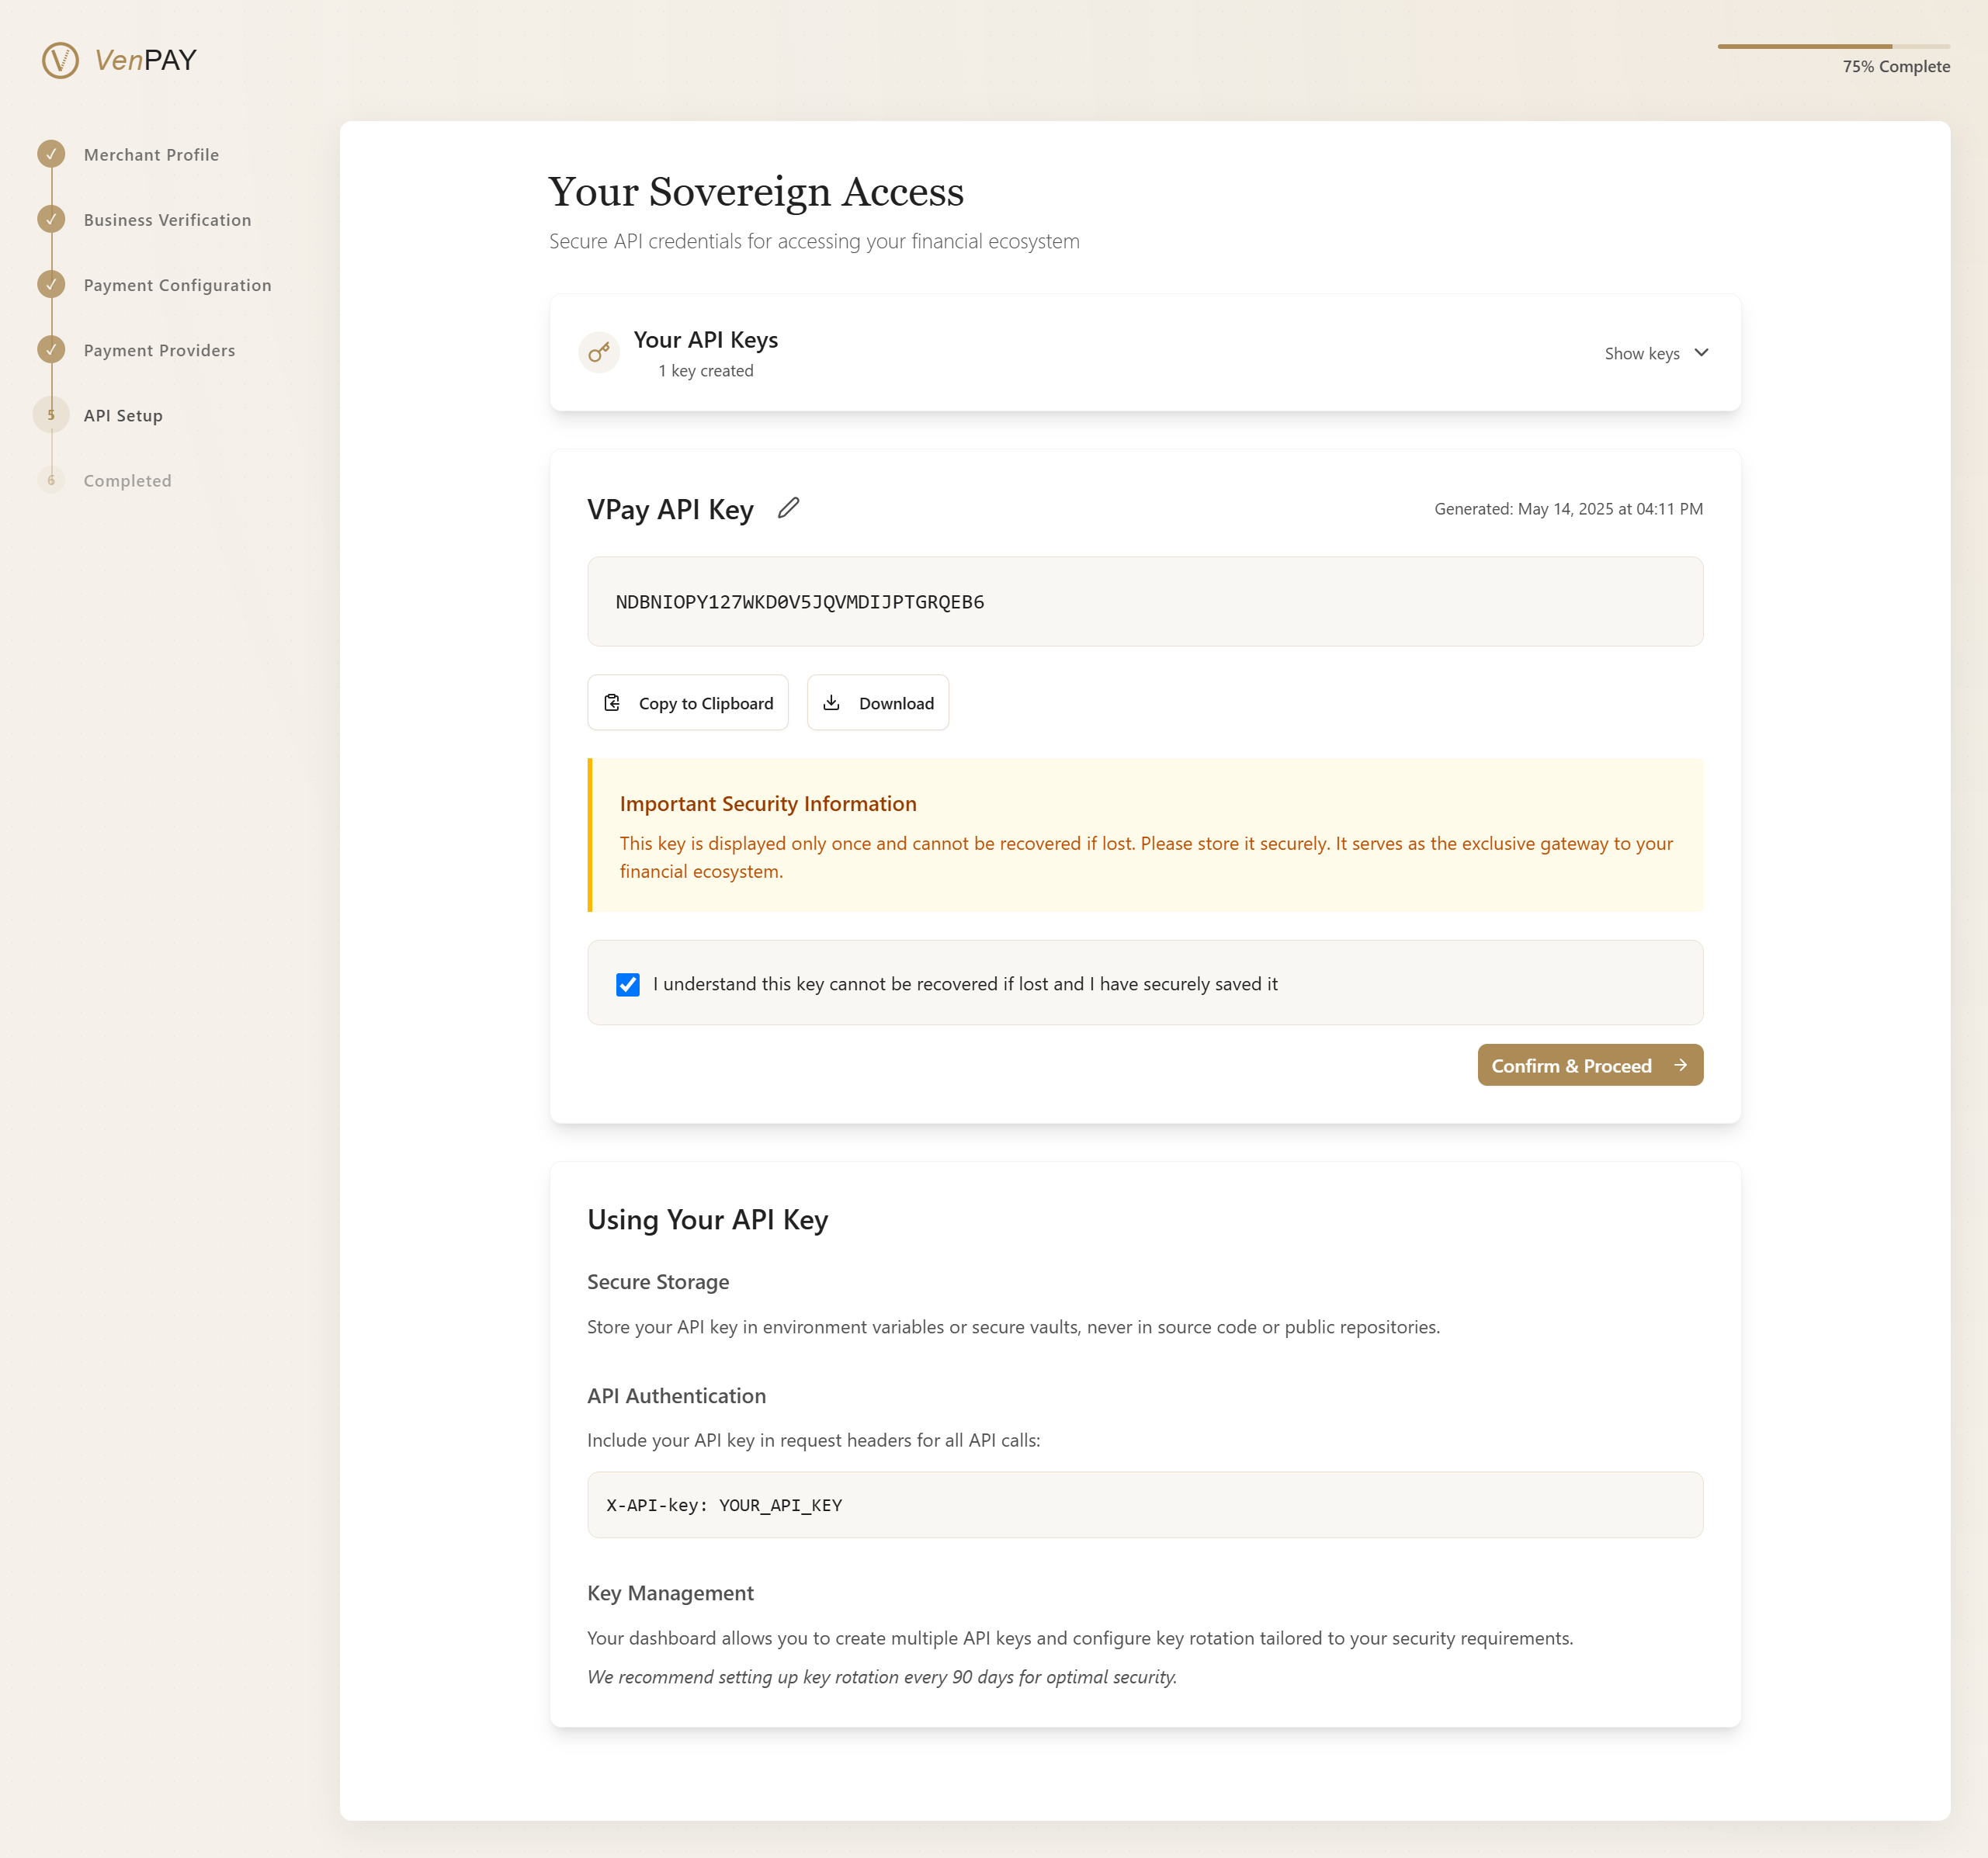
Securely store your API key — it will not be shown again
🛡️ Important Security Instructions
🔒 Store It Safely
- Save the key in an encrypted secrets manager or environment variables.
- Never commit it to version control (e.g., Git).
- Avoid sharing it publicly or storing in client-side code.
📡 Use It Correctly
Include your API key in request headers for all API calls:
X-API-Key: YOUR_API_KEY
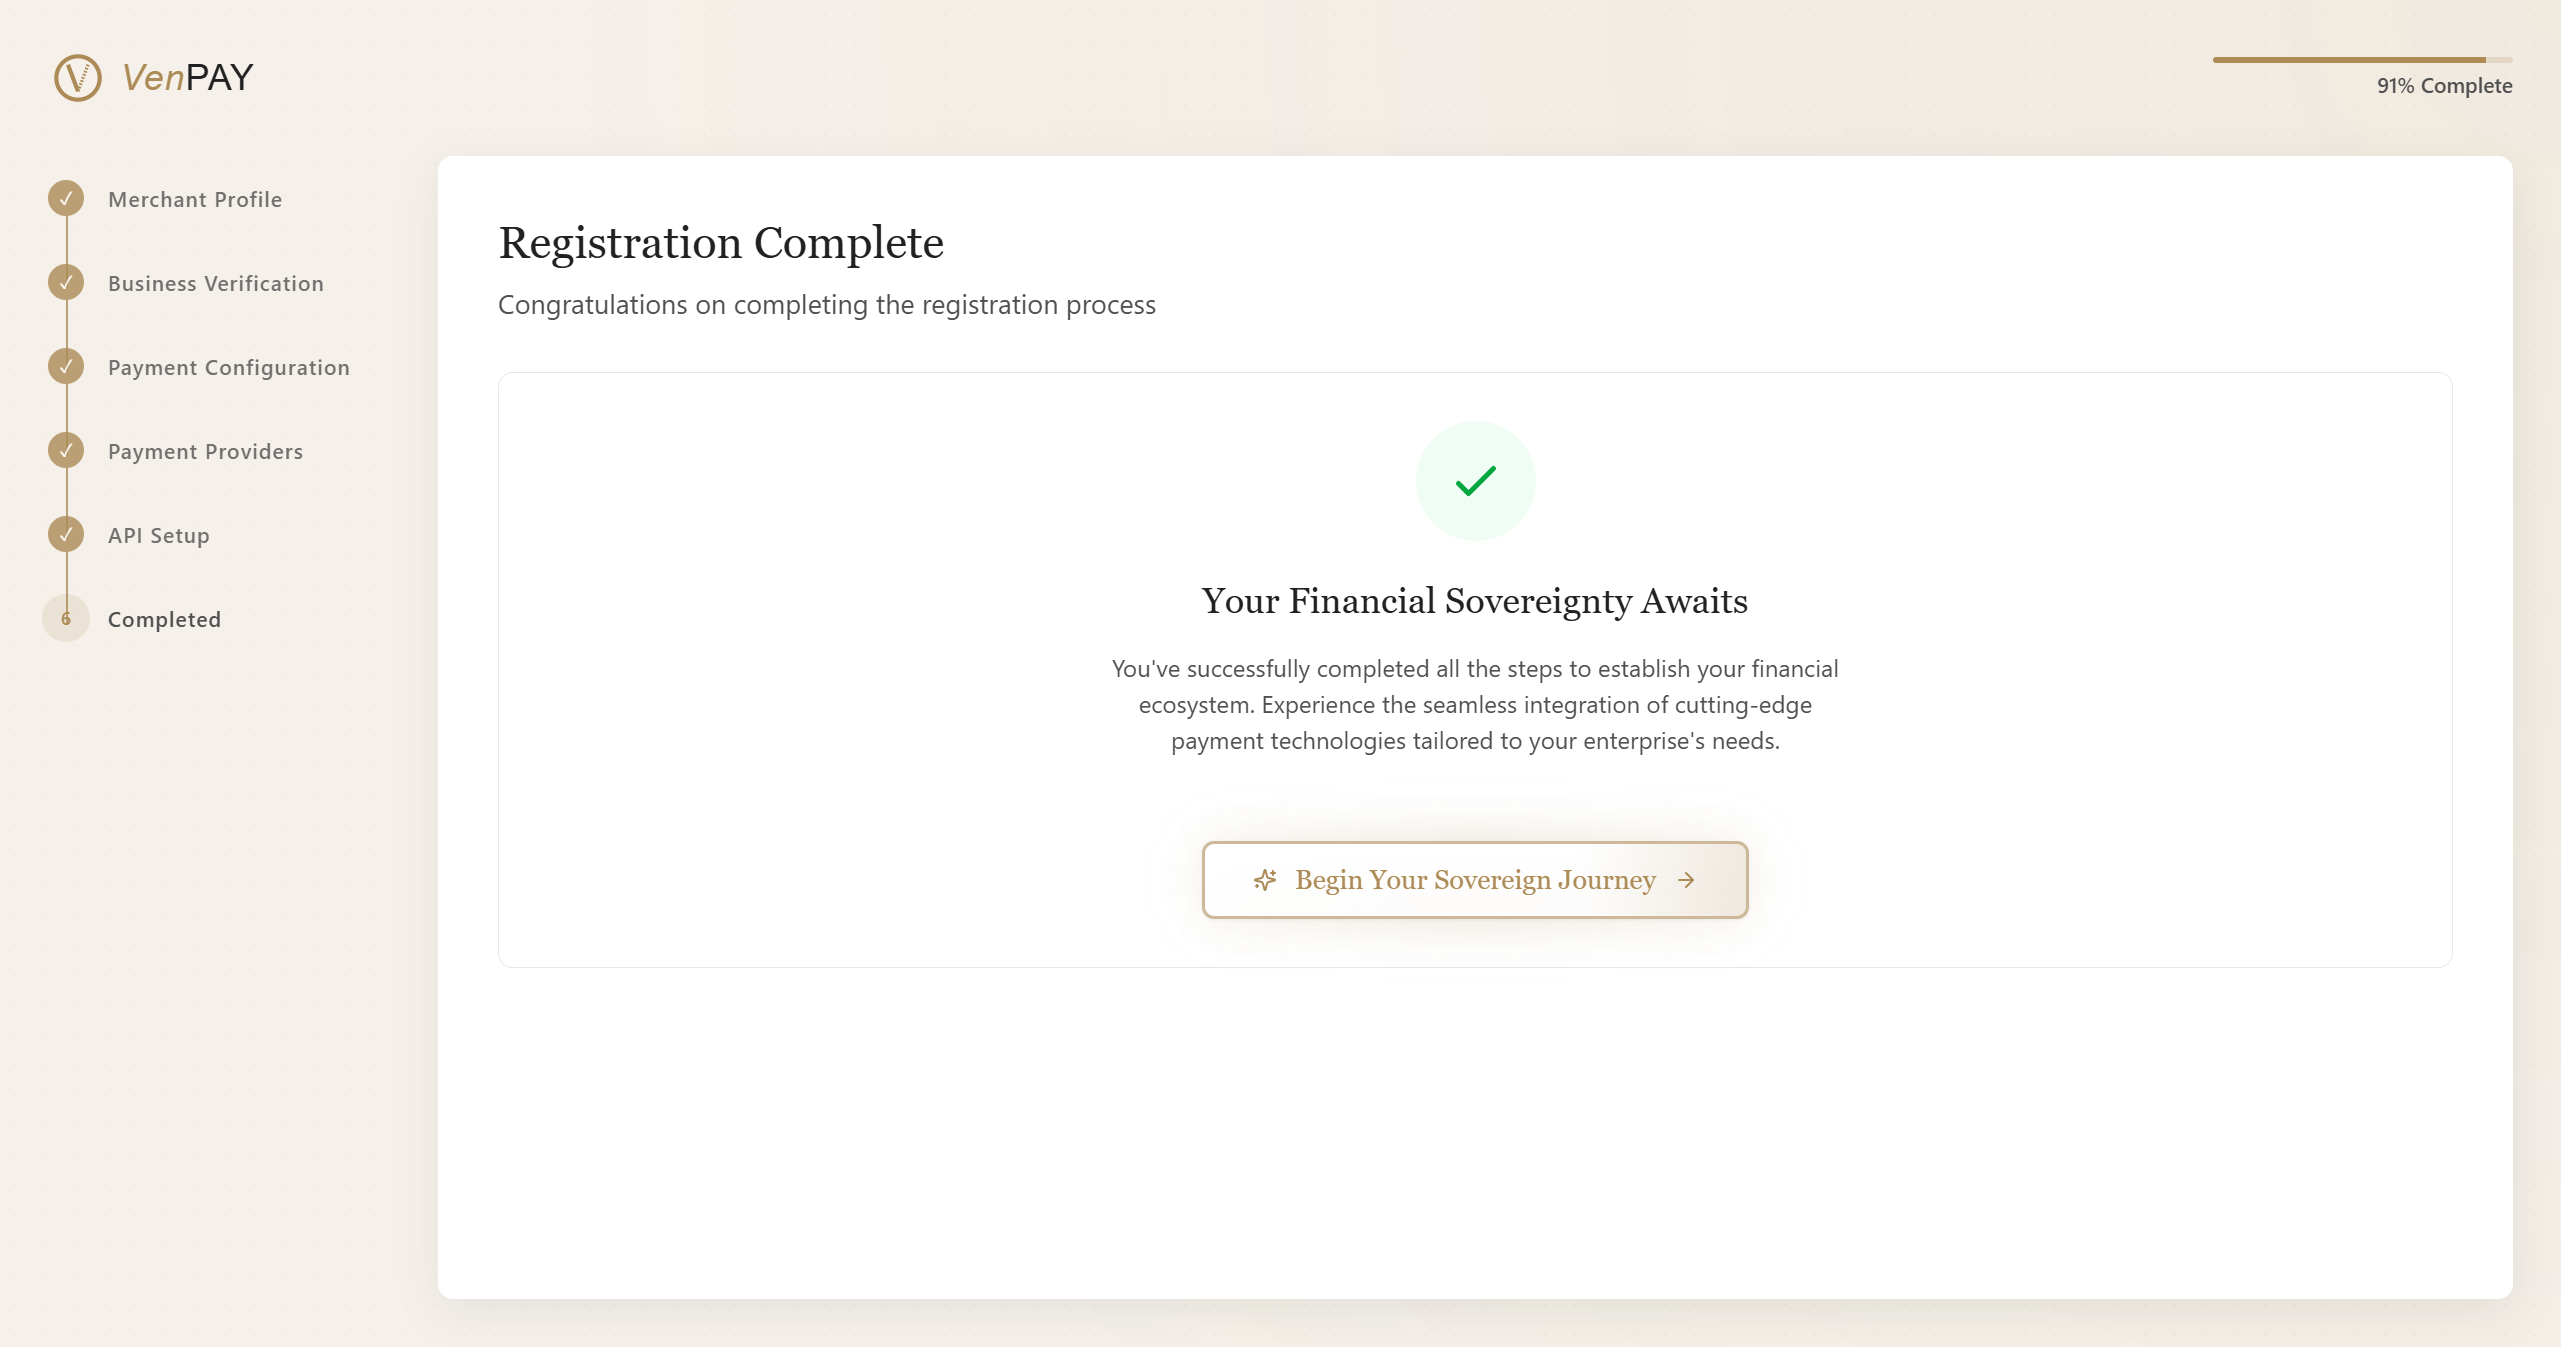
🎉 Registration Complete
🏁 Congratulations on Completing the Registration Process
🌍 Your Financial Sovereignty Awaits
You've successfully completed all the steps to establish your financial ecosystem. Experience the seamless integration of cutting-edge payment technologies tailored to your enterprise's needs.
📘 You already have a completed merchant setup.
👉 Please access your Dashboard to continue your journey.
Welcome to a new era of financial control and independence
💼 What’s Next?
- Explore your merchant dashboard
- Set up recurring payments or subscriptions
- Monitor transactions in real time
- Configure additional merchants or payment methods